


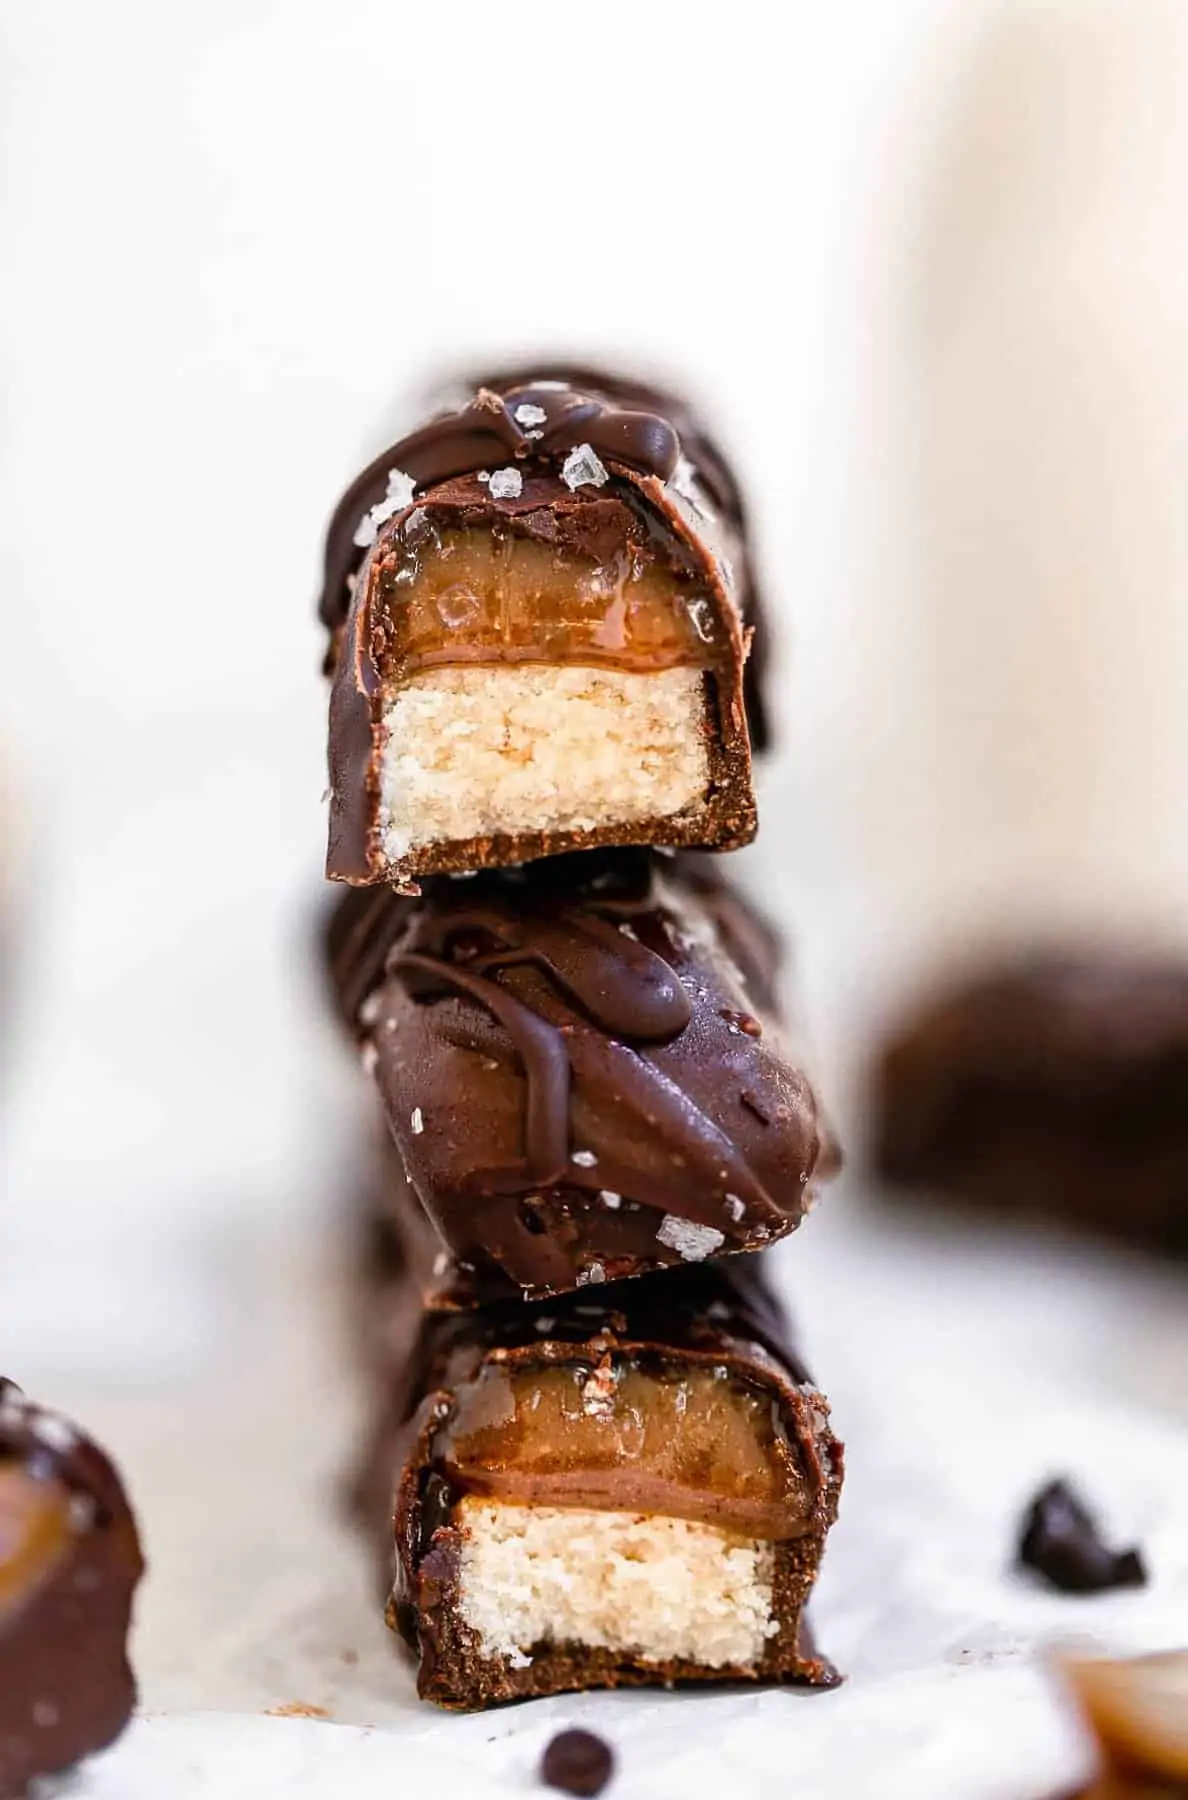
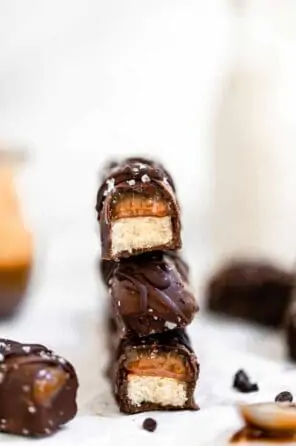
Need to satisfy your sweet tooth? These healthy homemade twix bars are for you! They’re naturally vegan and gluten free with a simply almond flour shortbread and luscious salted caramel filling.
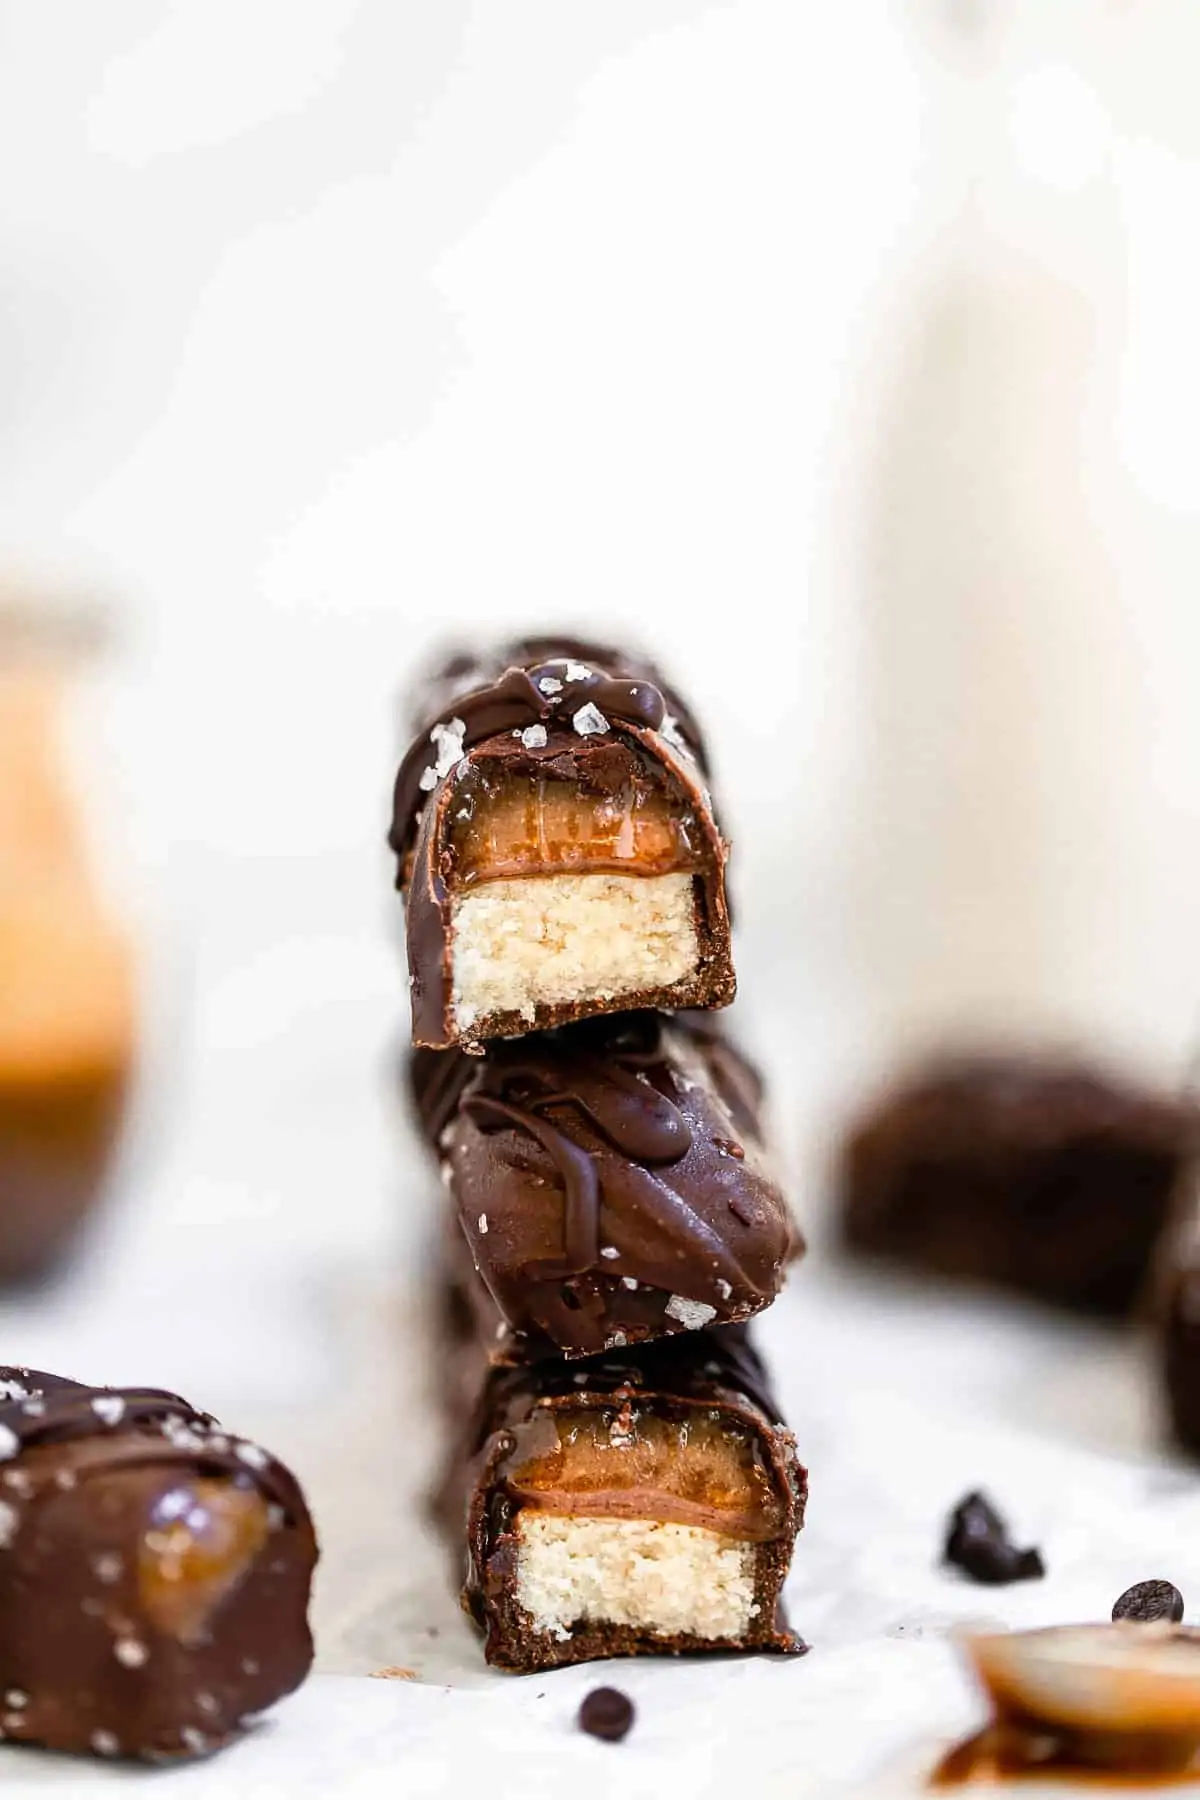
I’m usually a fruity or sour candy kind of gal, but I have a special place in my heart for Twix. Chocolate and caramel have always been two of my favorites, plus the shortbread layer and my tastebuds just go to heaven every time.
Except that real Twix are not gluten free, so I just had to make my own! They’re also not vegan, and I wanted these homemade twix bars to be both vegan and gluten free, which is always a tricky task.
It starts with a simple paleo and gluten free shortbread crust made out of a base of almond and tapioca starch.
Then we’ll layer on a 4 ingredient vegan caramel made with either almond butter or tahini (great either way!) that somehow tastes like traditional caramel despite being healthy!
Finally, all of that will be dipped in a chocolate coating made with chocolate chips of your choice. These bars are easy to make, fresh and the perfect healthy chocolate fix. The best homemade halloween candy!

How to make homemade twix bars
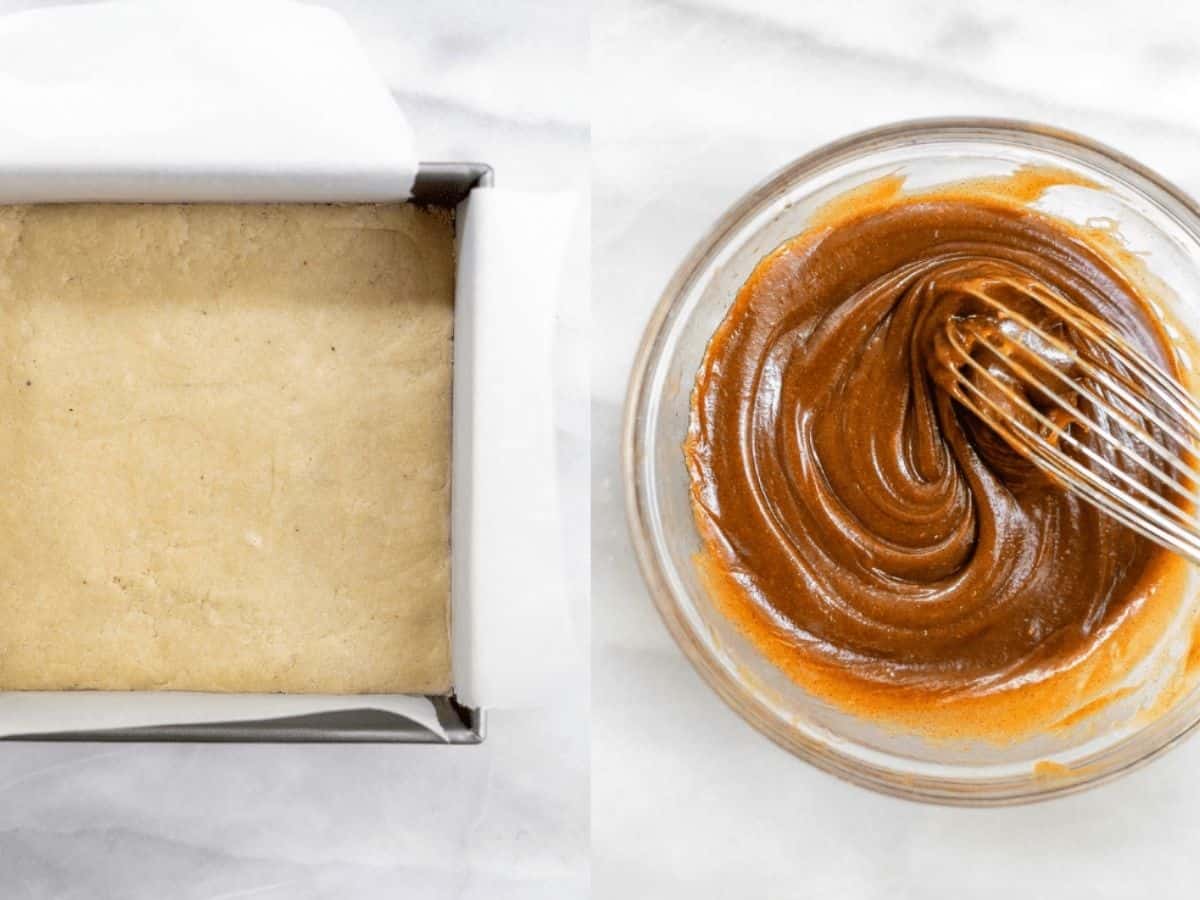
Make the shortbread: In a medium mixing bowl, combine all the ingredients for the crust with a wooden spoon. It should be neither wet nor dry, just a soft cookie dough like consistency.
Add to an 8×8 baking tray lined with parchment paper hanging over both ends (so you’ll need two pieces) which will make removal much easier. Spread evenly in the pan, then use a rubber spatula to press down.
Bake for 12-15 minutes or until lightly golden brown around the edges.
Make the Caramel: Meanwhile, whisk together all ingredients for the caramel filling in a bowl. Be sure to melt the coconut oil or butter first, then add everything else. Whisk until completely smooth.
When the crust is done, let cool for about 5 minutes, then pour the caramel on top. Spread evenly. Place flat in the freezer for about 45 minutes to 1 hour to set.
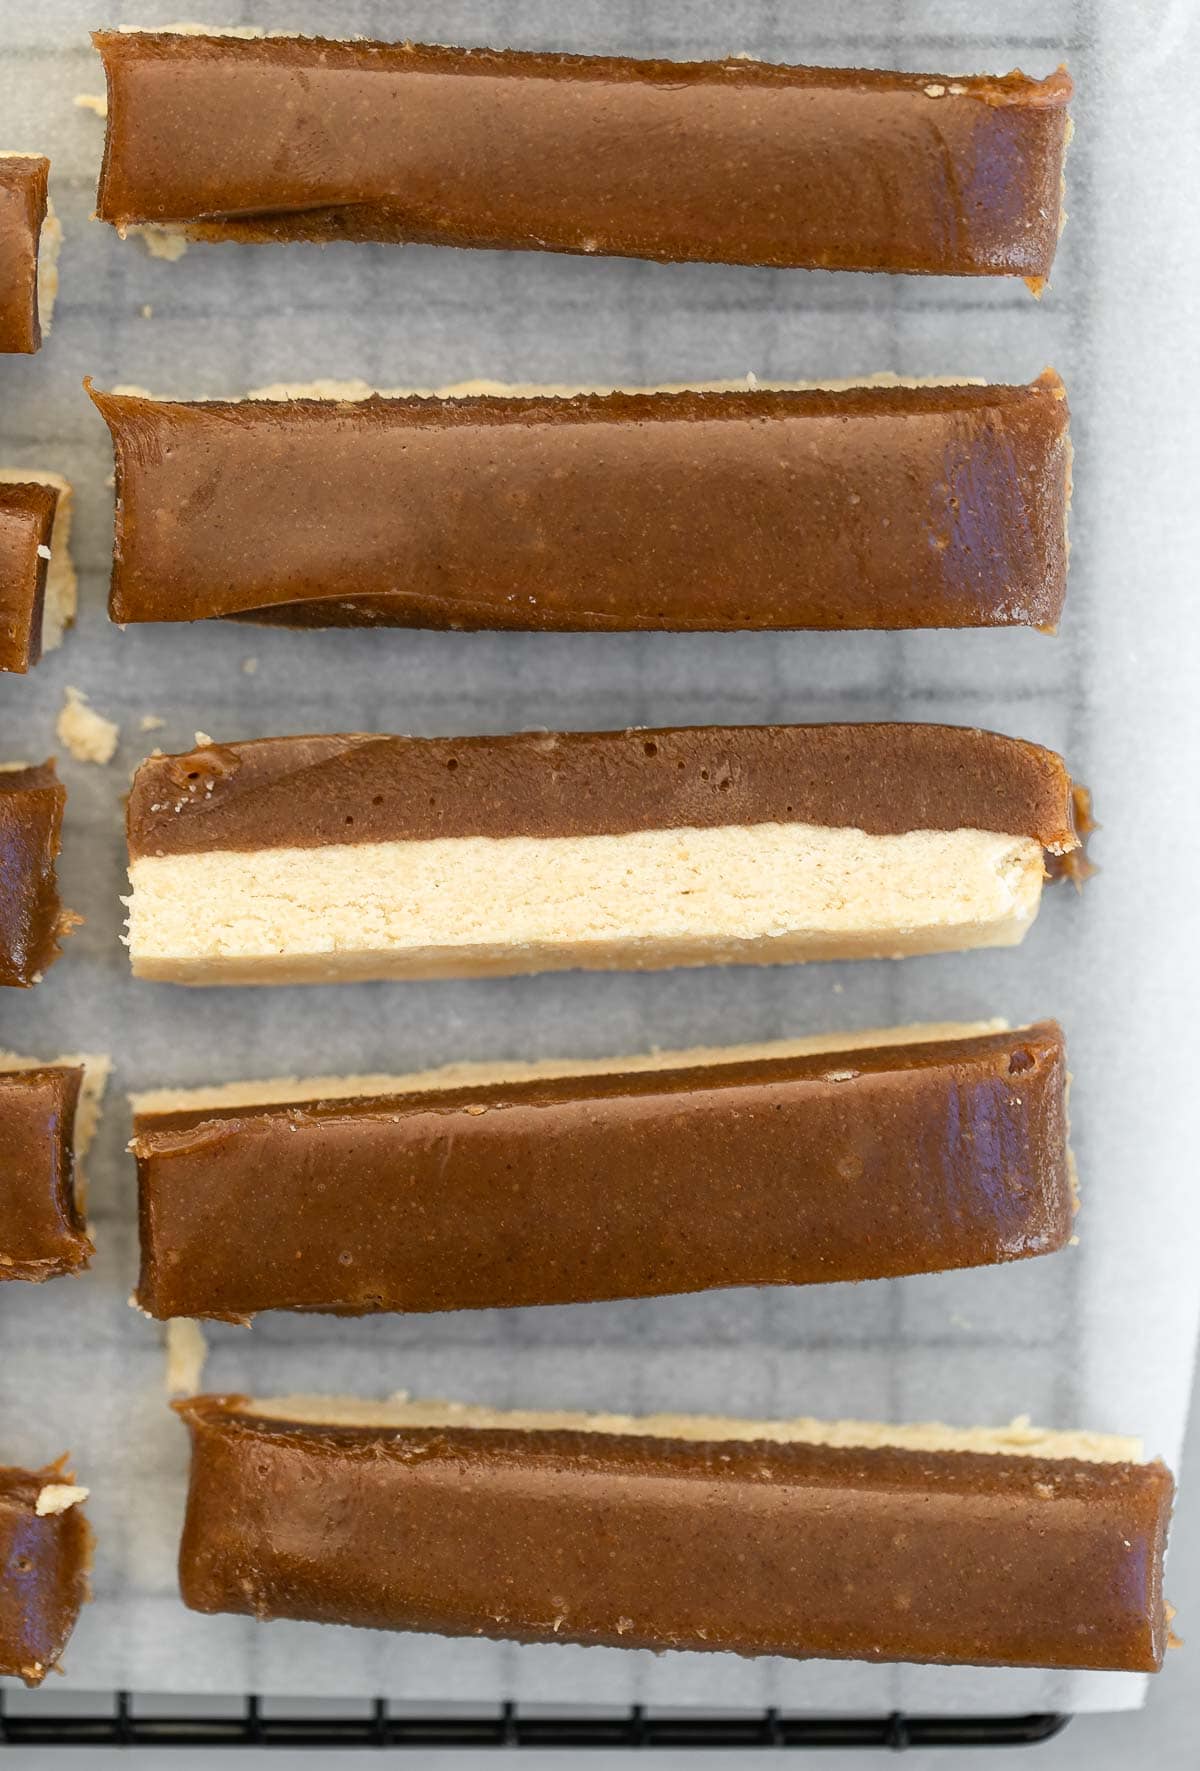
Prep the Chocolate: Once it has set, add the chocolate chips and coconut oil to a bowl and melt in the microwave at 30 second intervals, stirring between each interval. It usually takes mine about 90 seconds total to fully melt.
Remove the bars from the baking tray and peel back the parchment. if the caramel sticks, just use a knife to slice it away. Cut in half, then cut each half into roughly 7-8 even pieces.
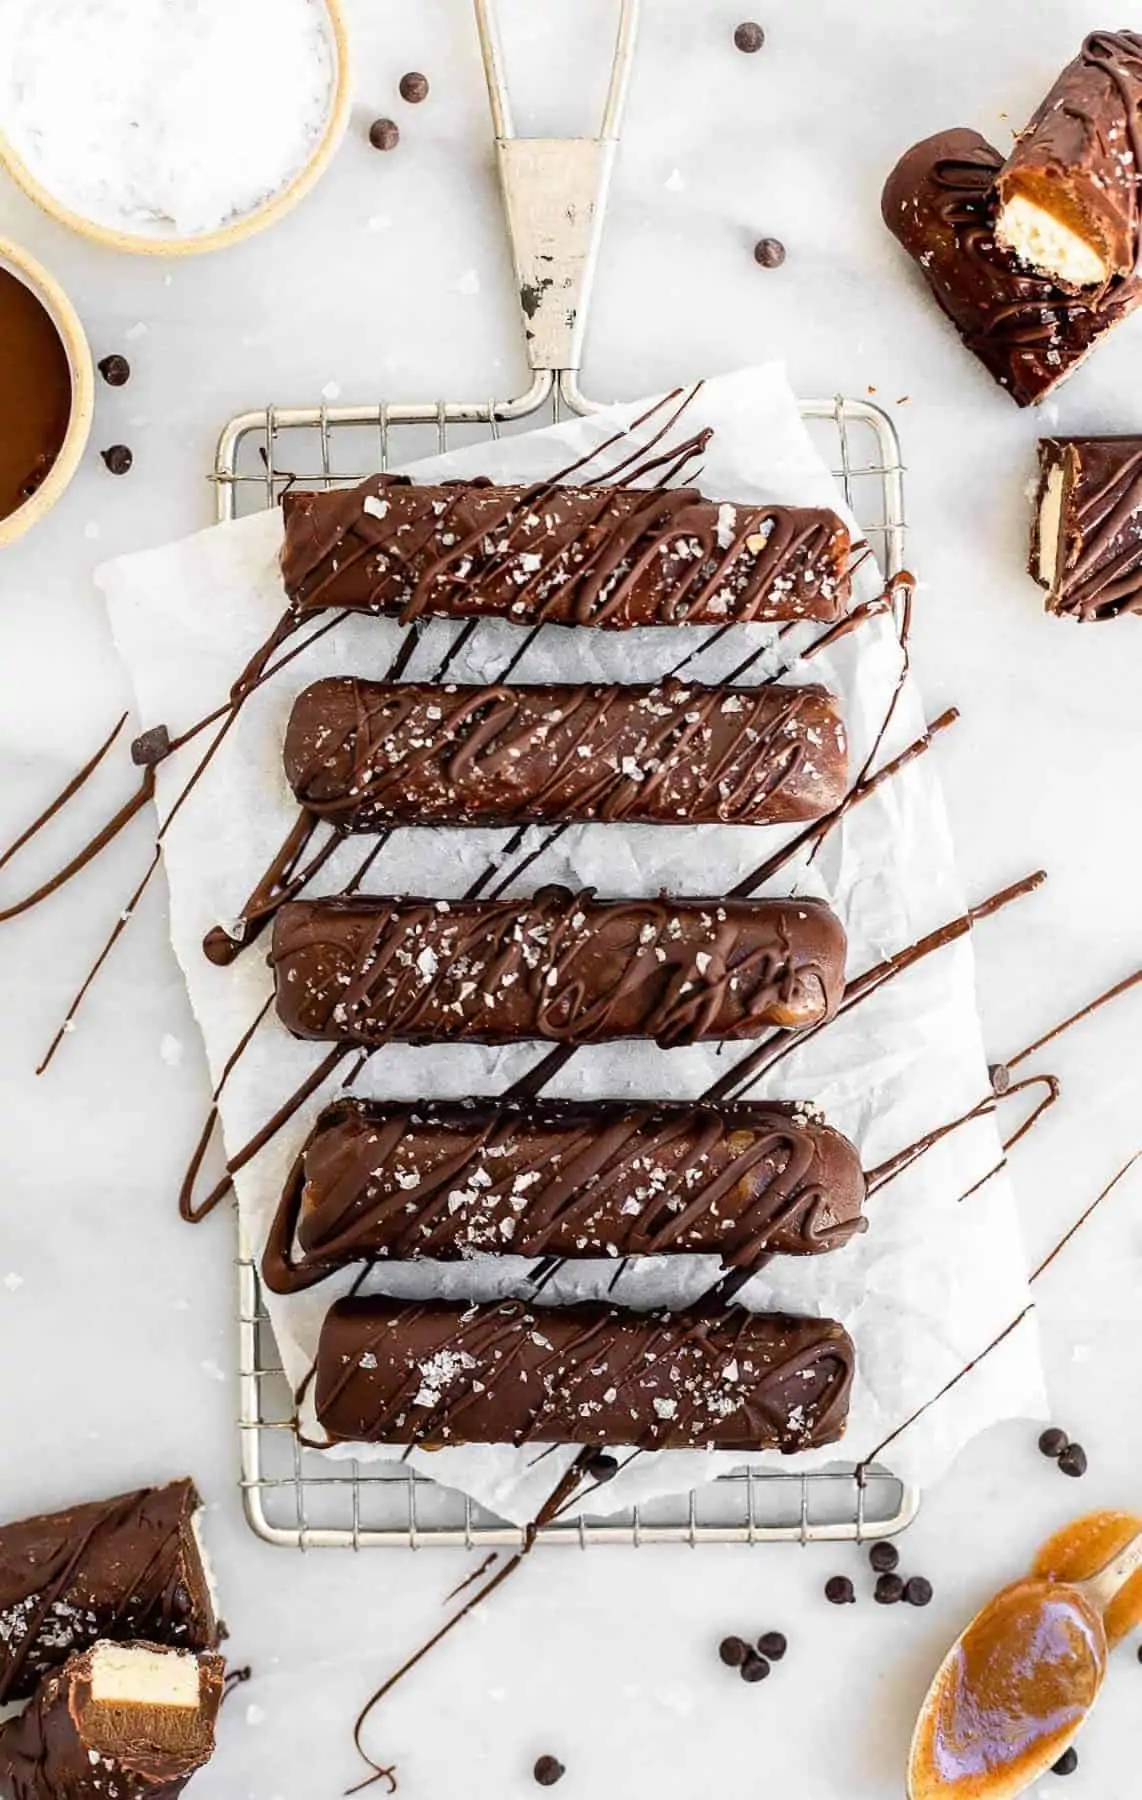
Put it all together: Take two forks and dunk the bar fully into the chocolate (keeping an eye on where the caramel is since you want that on top).
Let any excess chocolate drip off, then place on a piece of parchment paper. Repeat until each bar is fully coated. Sprinkle with salt flakes if desired. Transfer to the fridge to set for about 15 minutes and enjoy!
Storage Tips
Because of the freshness of these homemade twix bars, they need to be stored in the fridge. The caramel will still stay nice and soft and the chocolate will have a slight crunch to it.
They can be kept in the freeze until the chocolate is added. The shortbread and caramel portion will store in the freezer for up to 1 month, then slice and dip in chocolate when you’re ready to serve!
Variations and Subtitutions
NUTS. If you want to cut back on the nuts, you can use my classic vegan caramel sauce as the filling instead, which uses coconut cream and vegan butter. Alternatively, use tahini instead of almond butter!
For the crust, you can use the shortbread crust found in my lemon bars which uses all purpose flour in place of almond flour. With these subs, the Twix won’t be paleo or grain free, but still very delicious!
CHOCOLATE. As far as the chocolate coating goes, you can use any chocolate chips you like. Lily’s Sweets are great if you want to keep these paleo, but I also love Enjoy Life and Guittard.
Try these next!
Lastly, if you want more recipes straight to your inbox, be sure to subscribe to my email list. As always, tag me on instagram if you make this recipe so I can see your creation!
Homemade Twix Bars
by: claire cary
Ingredients
Base:
- 1 ¾ cups fine blanched almond flour
- ½ cup coconut flour
- ⅓ cup (vegan) butter or refined coconut oil melted
- ¼ cup maple syrup
- ¼ tsp salt
- 1 tsp vanilla extract
Caramel:
- ¾ cup almond butter or tahini see notes for brand recommendations
- ⅔ cup maple syrup
- 5 tbsp refined coconut oil melted
- ¼ tsp salt
- 1 tsp vanilla
Chocolate:
- 12 ounces chocolate chips see notes
- 1 tbsp coconut oil
Instructions
- Preheat the oven to 350 degrees Fahrenheit.
- In a medium mixing bowl, combine all the ingredients for the crust with a wooden spoon. It should be neither wet nor dry, a little crumbly is ok, but it should resemble a soft cookie dough consistency. If it seems too wet, just add a little more flour, too dry and add a touch more oil.
- Add to an 8×8 baking pan lined with parchment paper hanging over both ends (so you'll need two pieces) which will make removal much easier. Spread evenly in the pan, then use a rubber spatula to press down.
- Bake for 10-15 minutes or until lightly golden brown around the edges.
- Meanwhile, whisk together all ingredients for the caramel filling in a bowl. Be sure to melt the coconut oil or butter first, then add everything else. Whisk until completely smooth.
- When the crust is done, let cool for about 5 minutes, then pour the caramel on top. Spread evenly.
- Place flat in the freezer for about 45 minutes to 1 hour to set.
- Once it has set, add the chocolate chips and coconut oil to a bowl and melt in the microwave at 30 second intervals, stirring between each interval. It usually takes mine about 90 seconds total to fully melt.
- Remove the bars from the baking tray and peel back the parchment. if the caramel sticks, just use a knife to slice it away.
- Cut in half, then cut each half into roughly 7-8 even pieces.
- Take two forks and dunk the bar fully into the chocolate (keeping an eye on where the caramel is since you want that on top). Let any excess chocolate drip off, then place on a piece of parchment paper. Repeat until each bar is fully coated. Sprinkle with salt flakes if desired.
- Transfer to the fridge to set for about 15 minutes and enjoy!


Marian says
Can you sub the coconut flour with real AP flour?
Claire Cary says
I don’t recommend that here!
Victoria says
I literally cannot stop making these, they’re absolutely delicious!!!
Claire Cary says
Thanks Victoria, so happy you love them!
Victoria says
Hi Clara! How long do these stay good for in the fridge?
Claire Cary says
About a week!
Beth says
Would these freeze ok? (Hoping to make ahead and travel with them and gift to my nephew)
Claire Cary says
Yes, that should work!
Stephanie says
Why the need for almond and coconut flour? Will it still turn out if I use all almond flour?
Claire Cary says
Coconut flour is much more absorbent than almond, so you can’t sub coconut for more almond. If you don’t want to use coconut, you can try subbing for tapioca instead.
Gracie says
Tapioca starch is mentioned in the post but not listed in the ingredients. Do we need it?
Claire Cary says
No sorry! That’s supposed to say coconut flour 🙂
Gracie says
Okay great! And how important is the refined coconut oil? I have a jar of unrefined in the cupboard but not the other kind.
Claire Cary says
You can use unrefined but it will just give off a stronger coconut flavor! Refined coconut oil on the other hand doesn’t have a coconut flavor
Berta says
This were so good! I love the Carmel so rich and creamy, it also taste like the real thing!
Megan says
This are so good! Taste like the real thing!