Gluten Free Chocolate Cupcakes


These gluten free chocolate cupcakes are rich, moist, fluffy, spongey and dairy free optional. They’re easy to make and the perfect way to satisfy your chocolate craving!

An oldie but goodie Eat With Clarity recipe, but now even better! This gluten free chocolate cupcake recipe is one of the first recipes on the blog, but it was time for a major upgrade. Both to the recipe and to the photos!
These cupcakes are more rich, easier to make, and better than ever. With a fluffy and perfectly sweet sponge and silky smooth dairy free buttercream, this is the perfect chocolate treat for every occasion.
I feel like cupcakes and cakes are desserts that get reserved for special occasions, whereas cookies are an everyday thing, but I’m here to tell you you don’t need an excuse or a holiday to indulge a little! These chocolate cupcakes are fluffy, moist, spongey, cakey, chocolatey, perfectly sweet, and all the things a chocolate cupcake should be. With the perfect amount of rich chocolate density like my brownie cookies.
They’re both gluten free and dairy free, but if you did a blind taste test, I promise you would have NO idea. Try my mini chocolate cake, gluten free snack cake or dairy free cupcakes next!
Before we get started…
- You can use either hot brewed coffee or hot water here. I like coffee to enhance the chocolate flavor, but you can also use boiling water and add some espresso powder.
- If you don’t have an electric mixer, a whisk will work just fine!
- Be sure to use a good quality cocoa powder. We aren’t using any other form of chocolate for this recipe, so it’s key to get that rich flavor! Same with my gluten free red velvet cupcakes.
How to make gluten free chocolate cupcakes
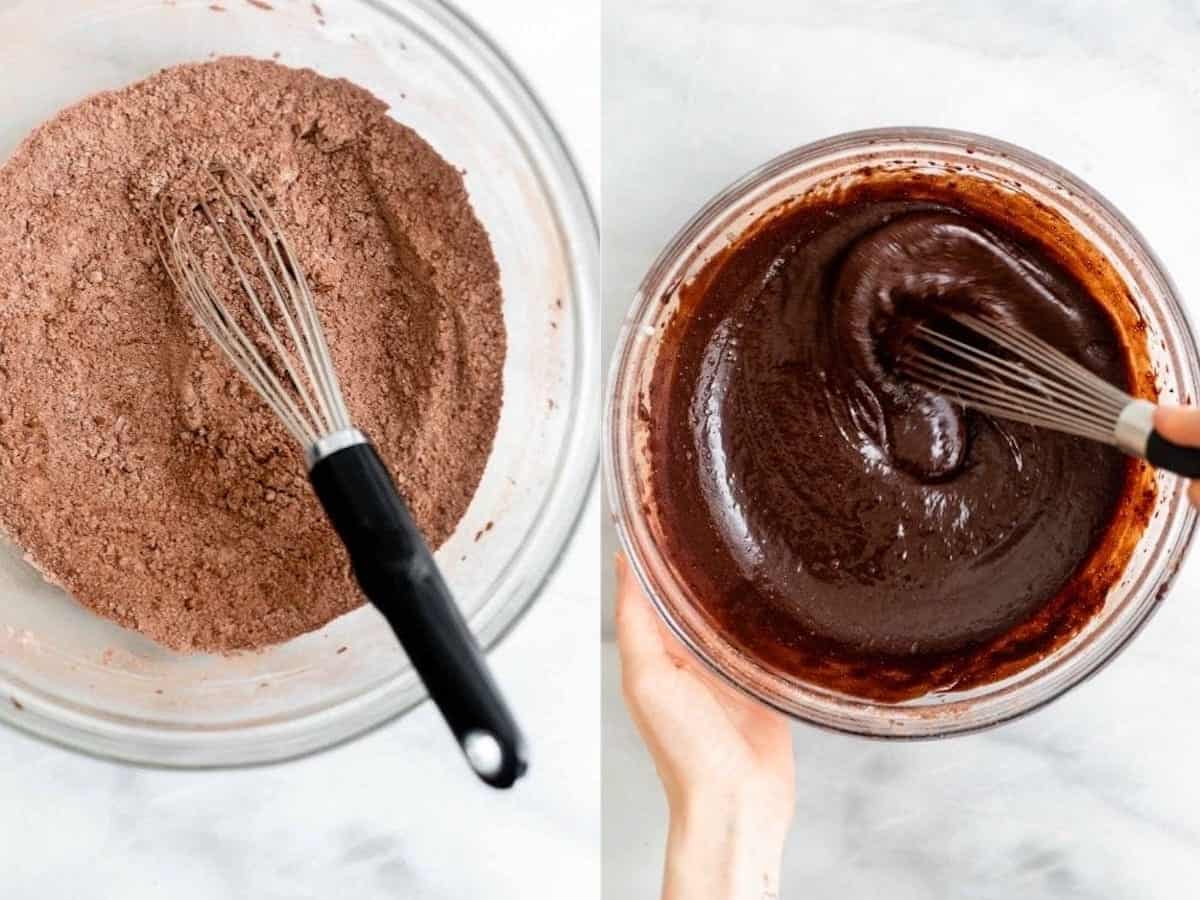
First, whisk together all dry ingredients. Beat in all wet ingredients with an electric mixer just until combined. Careful not to over mix, but make sure all ingredients from the bottom of the bowl are well combined.
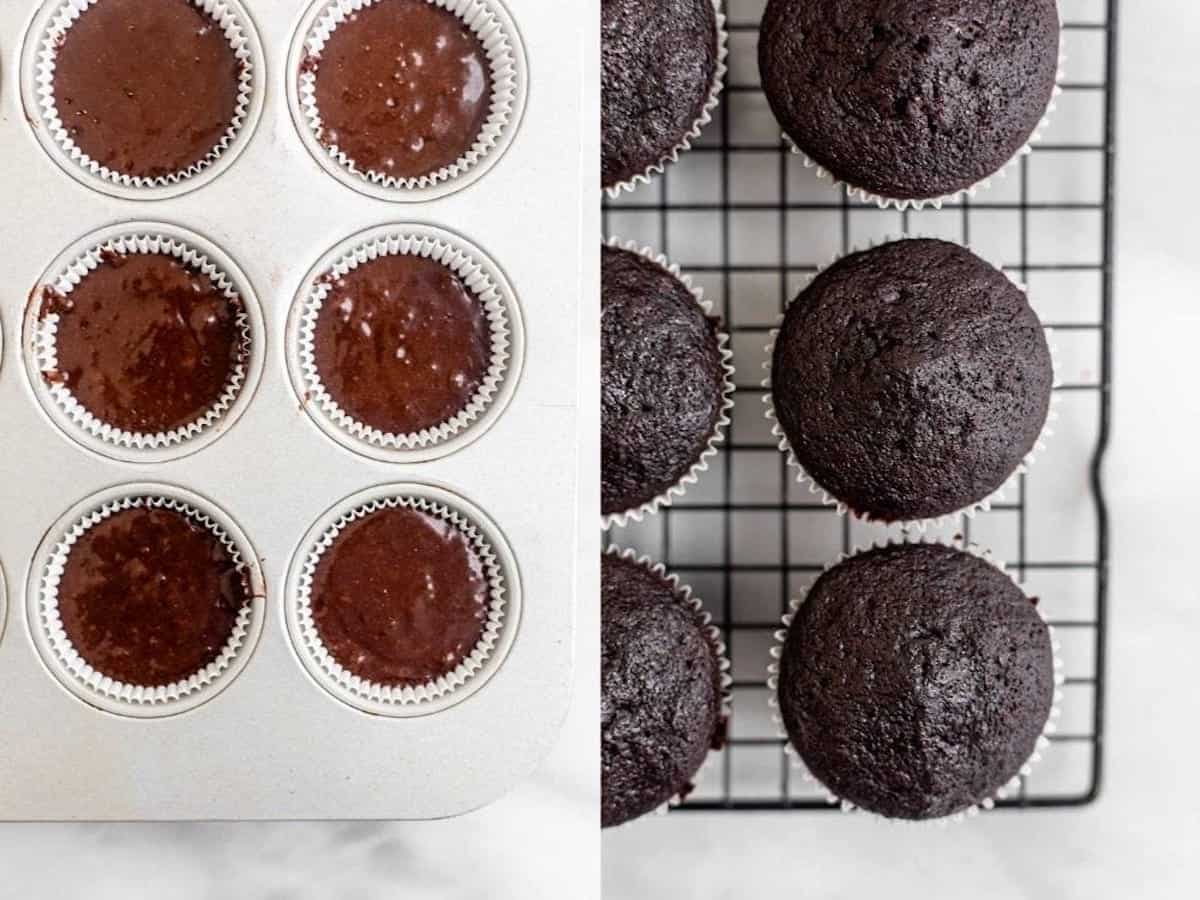
Once the batter is ready, use a cookie scoop or spoon and add the batter in 12 lined cupcake tins, filling about 2/3 of the way full.
Add to the center of the oven for 18-24 minutes. Check at 18 minutes and if a toothpick comes out clean, remove from the oven.
They will continue to cook slightly as they sit because the tray is still hot, so careful not to over bake because this will dry out the cupcakes.
In my oven, they are generally done at the 21 minute mark, but all ovens are different. Try my gluten free funfetti cupcakes or gluten free chocolate loaf cake next!
Key ingredients
FLOUR. I used the Bob’s Red Mill GF 1:1 All Purpose Baking Flour for this recipe which I recommend!
SUGAR. A mix of white sugar and brown sugar add such a nice flavor to these gluten free chocolate cupcakes. I do not recommend any liquid sweeteners here, but you can safely sub with coconut sugar.
OIL. Any plain, neutral flavored oil will work here. I used refined avocado oil, olive oil is also delicious and adds a rich flavor.
EGGS. Two eggs will help bind all ingredients together and help make the cupcakes nice and fluffy.
COCOA. Necessary for the chocolate flavor of course!
WANT TO SAVE THIS RECIPE?
HOT WATER OR COFFEE. I love using brewed coffee to really enhance the chocolate flavor, but you can also use hot water and add some espresso powder.
How to make chocolate buttercream frosting
Dairy free buttercream is actually much easier than you would think. Buttercream is essentially a mixture of powdered sugar and butter, so to make it dairy free, all you need to do is use dairy free butter.
You want to use room temperature butter so it’s easy to beat but not too soft, but if yours was in the fridge, microwave for about 20 seconds and you should be good to go.
Add the butter to a large mixing bowl and beat with an electric mixer until fluffy. Then, beat in the cocoa powder and powdered sugar until thick and creamy. Finally, beat in the milk and vanilla.
I used these large piping tips to get the ruffled look, but you can also take a blob of buttercream on a knife and swirl it around and it’ll taste just the same.
If you are going to use piping tips, the consistency of the buttercream is really important. Too thin and it won’t hold the shape, too thick and it won’t twirl around the cupcake. When in doubt, this video tutorial is really helpful when frosting!

The best flour for gluten free baking
There are other GF all purpose baking flours out there, but not all of them are the same blend. You can definitely try using other ones, but it may yield a slightly different result.
Whichever you use, make sure it has xanthan gum in the mix.
This recipe does not call for almond flour because I wanted to keep it nut free, but you can try my almond flour chocolate cake instead! It’s just as rich and delicious, I promise!

How to store and freeze
Once prepared, these cupcakes will store for about 3-5 days. Keep them in an air tight container at room temperature for best results. Keeping them sealed will ensure these cupcakes stay nice and moist.
If you’re wondering if gluten free cupcakes can be frozen, the short answer is yes!
However, you’ll want to freeze them before they are frosted. I do not recommend storing these in the fridge, because gluten free baked goods can dry out if they get too cold unfortunately.
Tips to keep gluten free cupcakes moist
These gluten free chocolate cupcakes are made extra moist with the help of some hot water, eggs and oil. I used avocado oil but melted dairy free butter also does the trick.
The eggs also helps the cupcakes get nice and fluffy too. These cupcakes will be (and stay) nice and moist as long as they are not over baked!

Try these recipes next
- Chocolate Energy Bites
- Chocolate Peppermint Cookies
- Red Velvet Cupcakes
- Lemon Cupcakes
- Gluten Free Mini Cupcakes
Lastly, if you want more recipes straight to your inbox, be sure to subscribe to my email list. As always, if you make this recipe, be sure to tag me on instagram and leave a comment below so I can see your creation!

Gluten Free Chocolate Cupcakes
by: claire cary
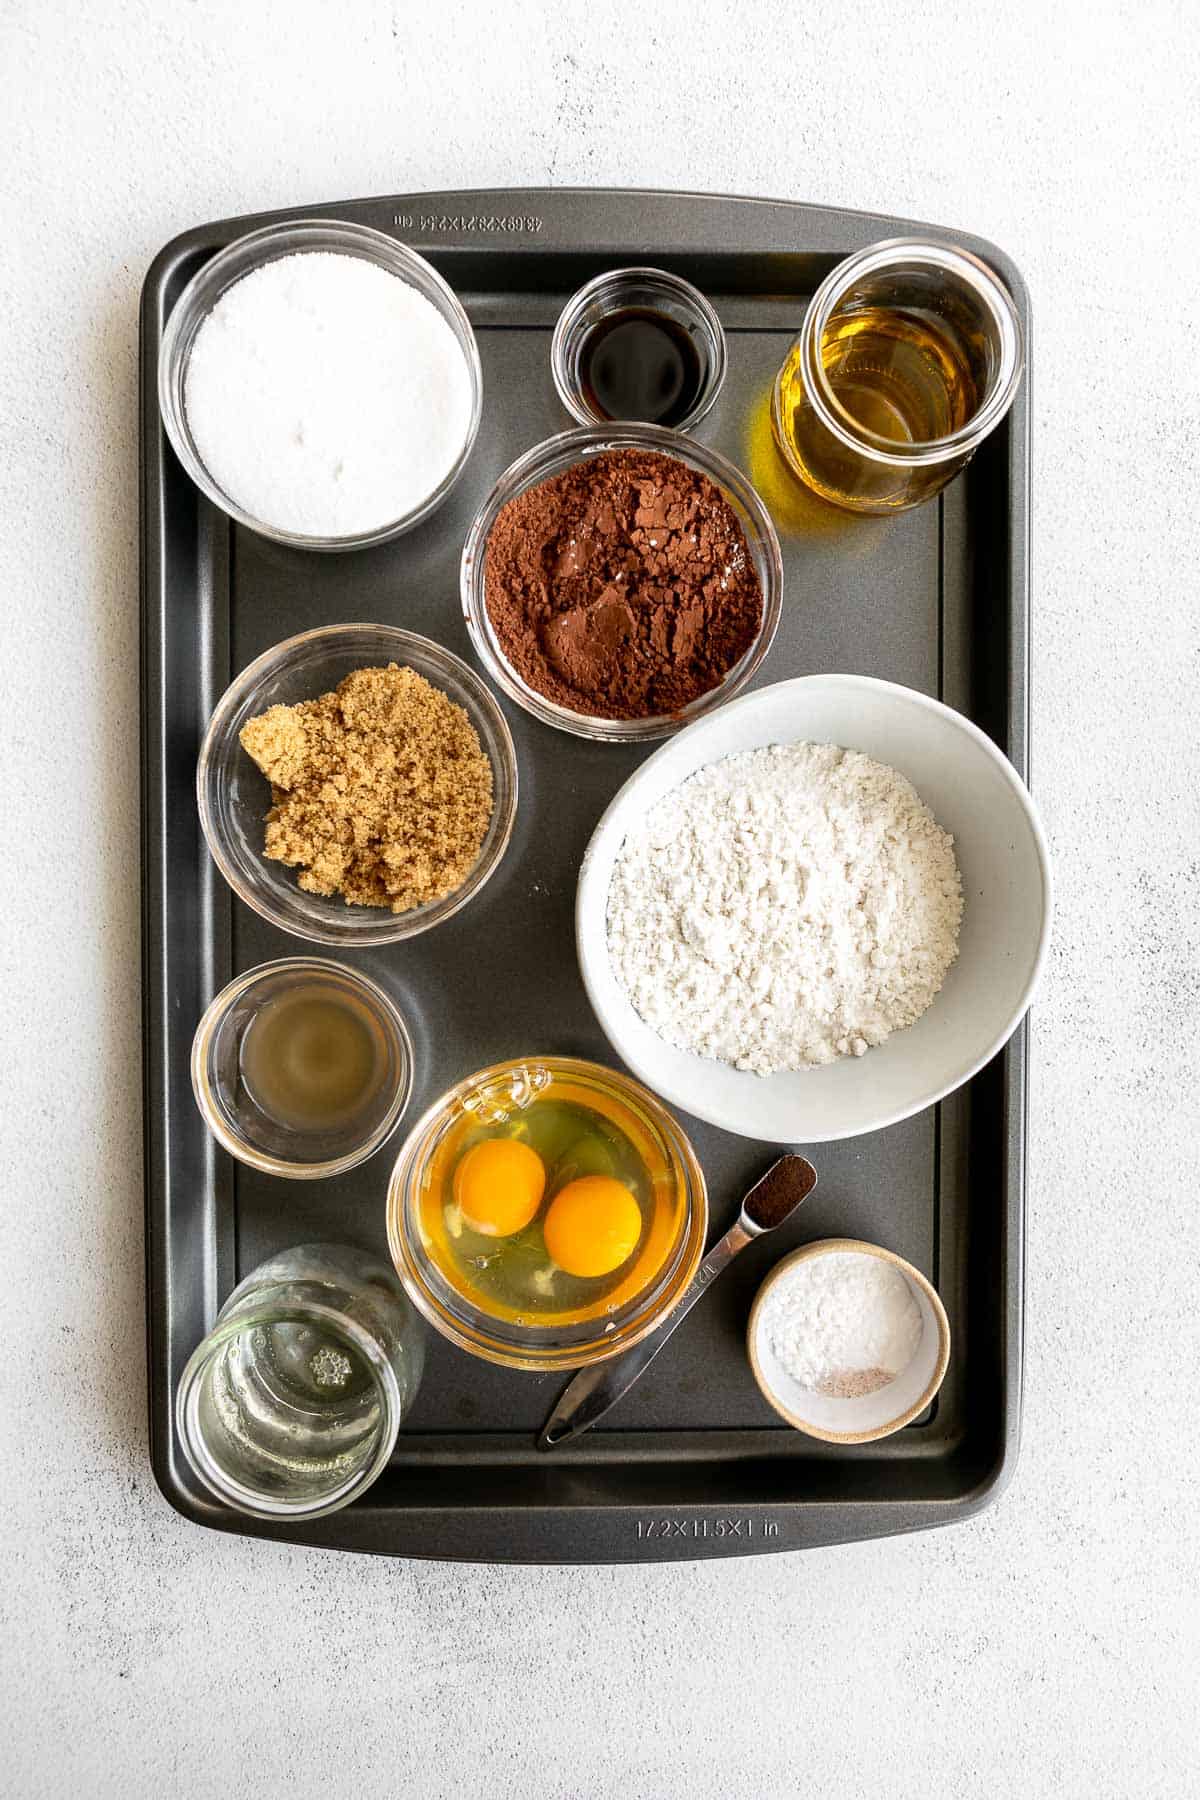
Ingredients
Wet
- ⅔ cup white sugar
- ¼ cup light brown sugar
- 2 eggs at room temperature
- 2 teaspoons vanilla extract
- ⅓ cup oil I like olive oil for a rich flavor, but any oil works
- ⅔ cup boiling water or hot brewed coffee
- 1 teaspoon apple cider vinegar
Dry
- ¾ cup + 2 tablespoons Bob’s Red Mill GF 1:1 All Purpose Baking Flour spoon and level to measure
- ½ cup cocoa powder spoon and level to measure
- ¼ teaspoon salt
- ½ teaspoon baking soda
- ¾ teaspoon baking powder
- 1/2-1 teaspoon espresso powder optional but recommended for a richer chocolate flavor
Buttercream
- ½ cup unsalted butter at room temperature, dairy or non-dairy
- 2-3 tablespoons milk
- 2 teaspoons vanilla
- ½ cup cocoa powder or more to taste
- 2-3 cups powdered sugar
- Sprinkles for topping
Instructions
- Preheat the oven to 350 degrees Fahrenheit and line a muffin tray with liners and set aside.
- Whisk together all dry ingredients in a large bowl.
- Beat in all wet ingredients on medium speed until well combined, making sure you get all of the dry ingredients from the bottom. the batter will be on the thinner side, but not too runny.
- Use a cookie scoop or spoon and add the batter in 12 lined cupcake tins, filling about 3/4 of the way full.
- Add to the center of the oven for 18-24 minutes. Check at 18 minutes and if a toothpick comes out clean, remove from the oven.
- They will continue to cook slightly as they sit, so careful not to over bake because this will dry out the cupcake. In my oven, they are generally done at the 20 minute mark.
- Remove from the oven and let cool in the pan for about 10-15 minutes, then transfer to a wire rack to finish cooling.
- To make the buttercream, beat the room temperature butter with an electric mixer until fluffy.
- Beat in the cocoa powder. Beat in 2 cups of powdered sugar, then beat in 2 tbsp of milk and vanilla.
- If you want the frosting more chocolatey, you can sub some of the sugar for more cocoa, or vice versa for less chocolate. If the frosting is too thin, beat in a bit more sugar, too thick add more milk until it reaches your desired consistency.
- Let the cupcakes cool completely before frosting. Frost with piping tips or keep it simple and use a knife!
Notes

Comments
-
These cupcakes are amazing and super easy to make! Highly recommend. Moist and full of flavour!
Question: can these be batch cooked and frozen without the topping?
-
Yes! They will keep in the freezer for about a month or so.
-
-
These cupcakes are wonderful as is the buttercream. The coffee is the ticket in bringing out the chocolatey goodness. I’ve made them several times and they turned out perfect each time. Thanks!

-
am I able to use this recipe and omit the cocoa powder to make vanilla cupcakes? or would it not turn out? I want to make both vanilla and chocolate but I dont want to use 2 recipes
-
No! Unfortunately, you do need to use a different recipe for vanilla.
-
-
Great recipe! So moist. Thanks for the hint about the coffee.
-
These are the best df gf cupcakes hands down! For the frosting I substituted coffee for the milk (didn’t have any milk substitutes on hand) and they turned out amazing. Thank you for the recipe.
-
Thank you, Jenny!
-
-
I normally hate gluten free cake, but this was amazing! I could barely tell. will definitely make again! they were fluffy, moist, and had great flavor!
-
What measurement would you recommend if substituting sugar with monk fruit
TIA-
I would use a 1:1 sugar swap!
-
leave a comment and rating