How To Cook Quinoa
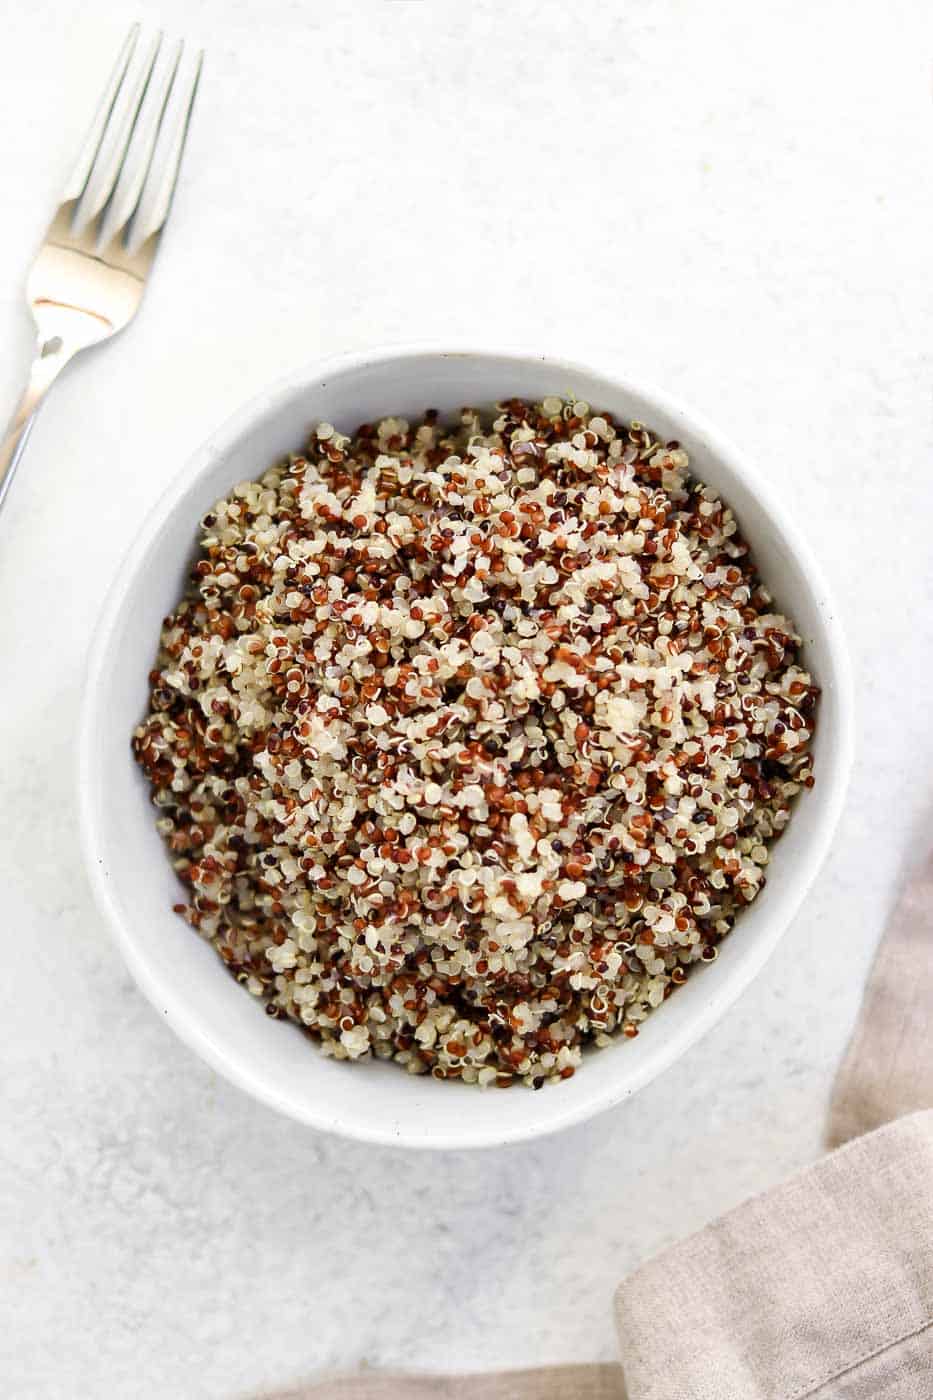
Quinoa is a delicious and versatile gluten-free seed. It’s incredibly easy to make and can be made into tons of different recipes, both savory and sweet. I’ll show you how to cook quinoa so it’s perfect every time!

What exactly is quinoa?
Quinoa (pronounced “KEEN-wah”) is my favorite. Though commonly served grain style, it is actually a seed, not a grain!
Along with buckwheat it’s classified as a “pseudo-grain” because it’s not a grain, but people often have it as a breakfast bowl, in sushi, buddha bowls, and other recipes where a grain would typically be present.
It is a complete source of plant based protein meaning it contains all nine essential amino acids. It’s naturally gluten free so it’s great for all types of eaters. Plus, with my easy method, you’ll have perfectly fluffy quinoa in just about 15 minutes!
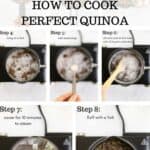
How to cook quinoa
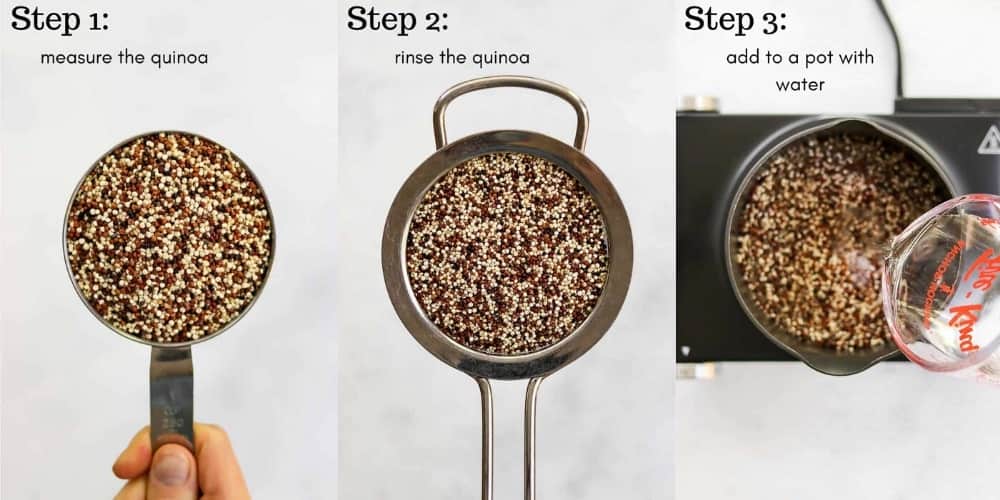
STEP 1: First things first, measure the quinoa. I use these dry measuring cups so the measurement is as exact as possible.
STEP 2: Next, rinse. This is to ensure there are no weird objects straying in the quinoa (it’s happened) and to rinse away the bitter coating that can sometimes make it taste a little funky. Rinse it for about 1 minute using a fine mesh strainer.
STEP 3: Once rinsed, add to a pot with water. You always want to use a 1:2 ratio of quinoa to water. So, if you’re cooking 1 cup of dry, you’ll want to use 2 cups of water. If you’re cooking 1/2 cup dry, use 1 cup of water and so on.
STEP 4: Bring to a low boil.
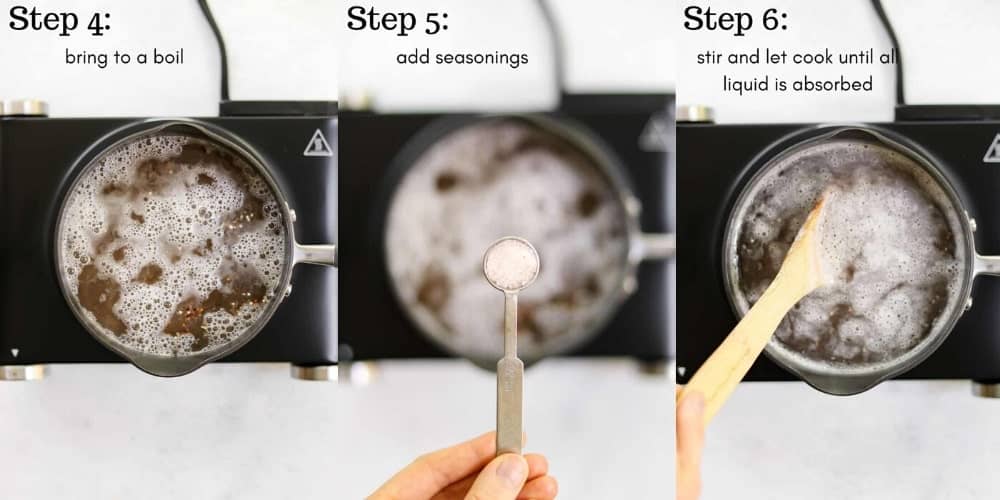
STEP 5: Add seasonings of choice. I always add salt, but some garlic or onion powder is always delicious.
STEP 6: Stir and let simmer over low heat, uncovered, until all of the water is absorbed.
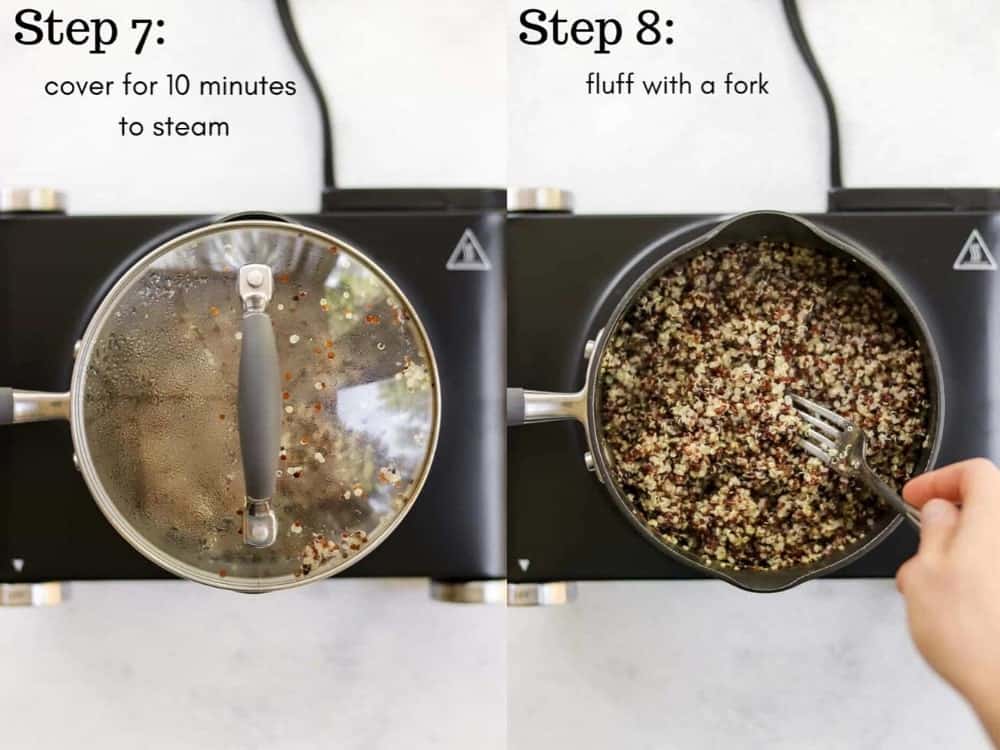
STEP 7: Cover to let it steam. At this point it will still look slightly undercooked, but it will continue to cook once it is covered, so do not add any extra liquid if you want the quinoa to be fluffy and not mushy!
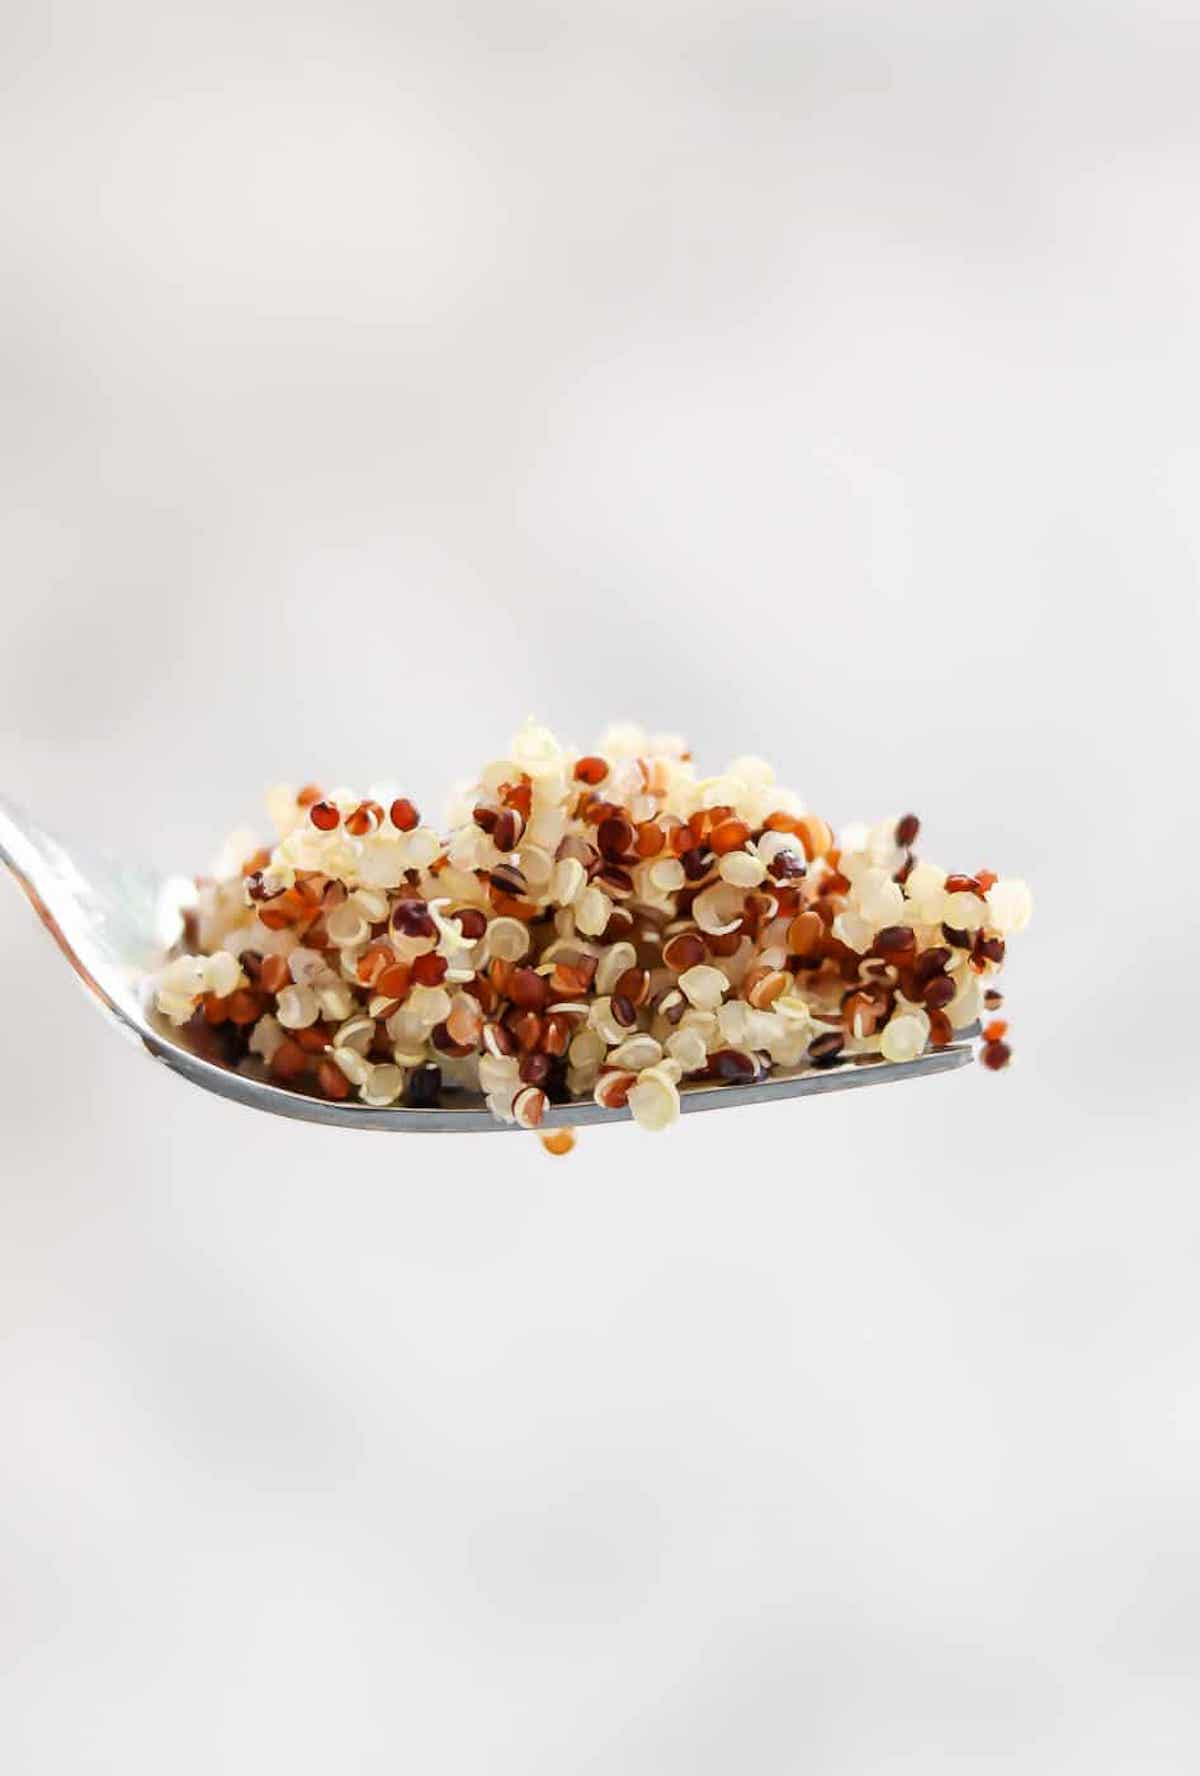
STEP 8: After about 10 minutes, it will be done, so fluff it with a fork and serve!
Why did it turn out mushy?
One reason people end up with mushy quinoa is because they follow the directions on the back of the package. You’d think that a package of quinoa would have proper instructions, but low and behold, it doesn’t.
If you follow the instructions on the package, you’ll usually be told to use a 1:2 ratio of quinoa to water (which is good!) but you’ll be instructed to cook it covered. This method isn’t necessarily bad but it will generally cause it to be mushy instead of fluffy.
Second, be sure to use a 1:2 ratio of quinoa to liquid. Any more liquid and you’ll probably end up with a bowl of mush instead of nice soft individual kernels.
How to freeze
Yes, you can absolutely freeze quinoa. Once cooked, it will keep in the fridge for 5-7 days or in the freezer for 3 months.
Be sure to let it cool down completely before storing it in either the fridge or the freezer. Store it in an air tight container (or even a zip lock bag in the freezer) for best results.
WANT TO SAVE THIS RECIPE?
Quinoa vs. Rice
Quinoa and rice are often compared because they can be used in place of each other in certain recipes, but they actually have quite different nutrition profiles and flavors.
Most people find that quinoa is a bit easier to digest than grains like rice. Quinoa is also lower on the glycemic index so it won’t spike your blood sugar as much.
Quinoa has a slightly nuttier flavor, whereas rice is more mild. The textures also vary quite a bit, but if you cook quinoa properly, it can be just as fluffy as fresh rice.
How much does it yield?
While cooking, quinoa expands by about 3 times. So, 1 cup of dry will yield about 3 cups of cooked quinoa. 1/2 cup of dry will yield 1 1/2 cups cooked etc.
If you need a certain amount of cooked quinoa for a recipe, divide that number by 3 and that’s approximately how much dry quinoa you will want to cook.
How to add flavor to quinoa
On its own, quinoa has a slightly nutty flavor that some people (like myself) enjoy, but not everyone likes the taste of it! I’ve been obsessed with quinoa for years, so I’ve nailed down a few tips to make your quinoa taste even more delicious!
Cook it in vegetable or chicken broth: This will infuse the quinoa with onion and garlic and savory flavors to really enhance the taste. If you do use vegetable broth instead of water, still make sure to use a 1:2 ratio of quinoa to liquid.
You will cook the quinoa exactly the same way you cook it with water, just with vegetable broth instead. Chicken broth also works if you are not vegan or vegetarian.
Add salt and seasonings to the water: I suggest adding salt to the water regardless, but you can also add in some garlic powder, onion powder, dried herbs, or even chili powder or cumin. Totally up to you!
Add a spoonful of vegetable bouillon to the water: This is similar to using vegetable broth in place of water, but if you don’t have any broth, you can add a spoonful (or a cube) of vegetable bouillon to the water. Add this in at the same time you add the other seasonings.
Try these quinoa recipes!
- Tabbouleh Salad
- Quinoa Stuffed Sweet Potatoes
- Breakfast Bowl
- Thai Vegan Salad
- Kale & Quinoa Salad
- Vegan Buddha Bowl
- 30 Minute Quinoa “Fried Rice”
- Quinoa Chickpea Salad
Try this recipe? Leave a comment and rating below and let us know how it turns out! Follow along on instagram or subscribe to my email list for more recipes & updates!

How To Cook Quinoa
by: claire cary
Ingredients
- 1 cup uncooked quinoa
- 2 cups water or vegetable/chicken broth
- Pinch of salt about 1/8 teaspoon
Instructions
- Rinse the quinoa and add to a pot with the water and salt.
- Bring to a rapid boil.
- Reduce heat to low and let simmer, uncovered, until most of the liquid is absorbed.
- After about 15 minutes or when the liquid is absorbed, remove from the heat and cover.
- Let steam for about 10 minutes to finish cooking.
- Fluff with a fork and enjoy!
Notes

Comments
-
I tried it and it works very well for fluffy quinoa. The simmer and steam aspects of this recipe results in really fluffy quinoa!!! This is the first time I’ve been able to achieve fluffy quinoa, since many recipes seem to result in sticky, overly wet quinoa that is overcooked in some places, yet undercooked in others.
Thank you for making a recipe that works.
I used 1 cup of apricot cider vinegar and 1 cup water to cook my second quinoa batch in and it tastes great! You can be really creative with what you boil the quinoa in, and therefore add innumerable flavors while doing so. Next I’m going to try mushroom juice (yummy!).
-
Fantastic directions for cooking quinoa! It’s always come out mushy before, and now I know why. One tip: the recipe was unclear about what to do after you cover the quinoa. I turned the heat off, and just let it sit. It came out delightful fluffy!
-
What part was unclear to you? Once you cover and remove from heat, just let it sit for 10 minutes, then fluff and serve!
-
-
This recipe take the guess work out.
But I’m confused. I have an old stove top with electric coils, they do
hold the heat once turned off.
My guess was once the liquid is absorbed you turn off the heat and let the quinoa steam on the still hot element. Instead I left it on lowest setting, then it started to stick. So I took off heat then returned to still hot element.Oh Claire I just found your reply comment to some one else. Yes you do turn off the heat, makes sense, thanks
-
Spot on! I was skeptical that my quinoa was not going to turn out but..I did the cover and steam for 10 mins and it is fluffy and delicious! So happy I followed this recipe! Thanks so much.
-
So glad it was a success! Thanks, Dianne!
-
-
I love quinoa and am always guessing how to cook only one or 2 servings. Great instruction and tips!
-
Thanks Robyn! So glad you found it helpful.
-
-
Just wondering if you turn off the heat once you cover the quinoa to steam.
-
Yes, the recipe says remove from heat!
-
-
Thank you for the metric measurements, 3.5 g table salt is a reasonable amount for 1x quantity.
For a less al-dente feel, keep the lid on throughout the simmering process.
-
Thanks for a great tutorial! It always ends up so fluffy!!
-
Perfect! Quinoa can be tricky, so I’m s happy this tutorial has helped.
-
-
Thank you so much for this helpful information! I will use your siggestions
leave a comment and rating