Gluten Free Red Velvet Marble Cake
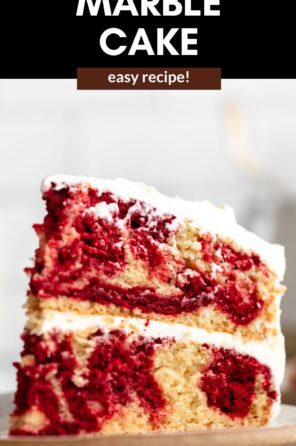
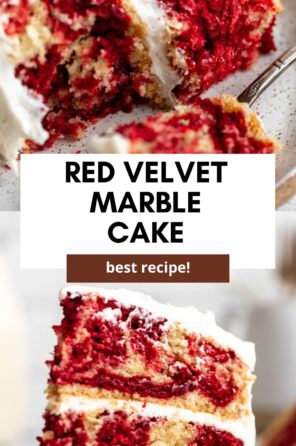

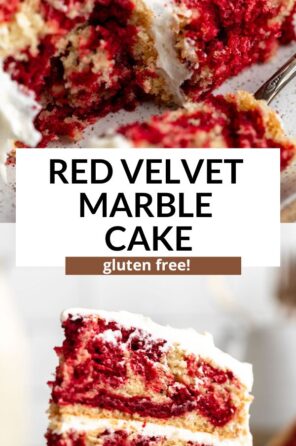
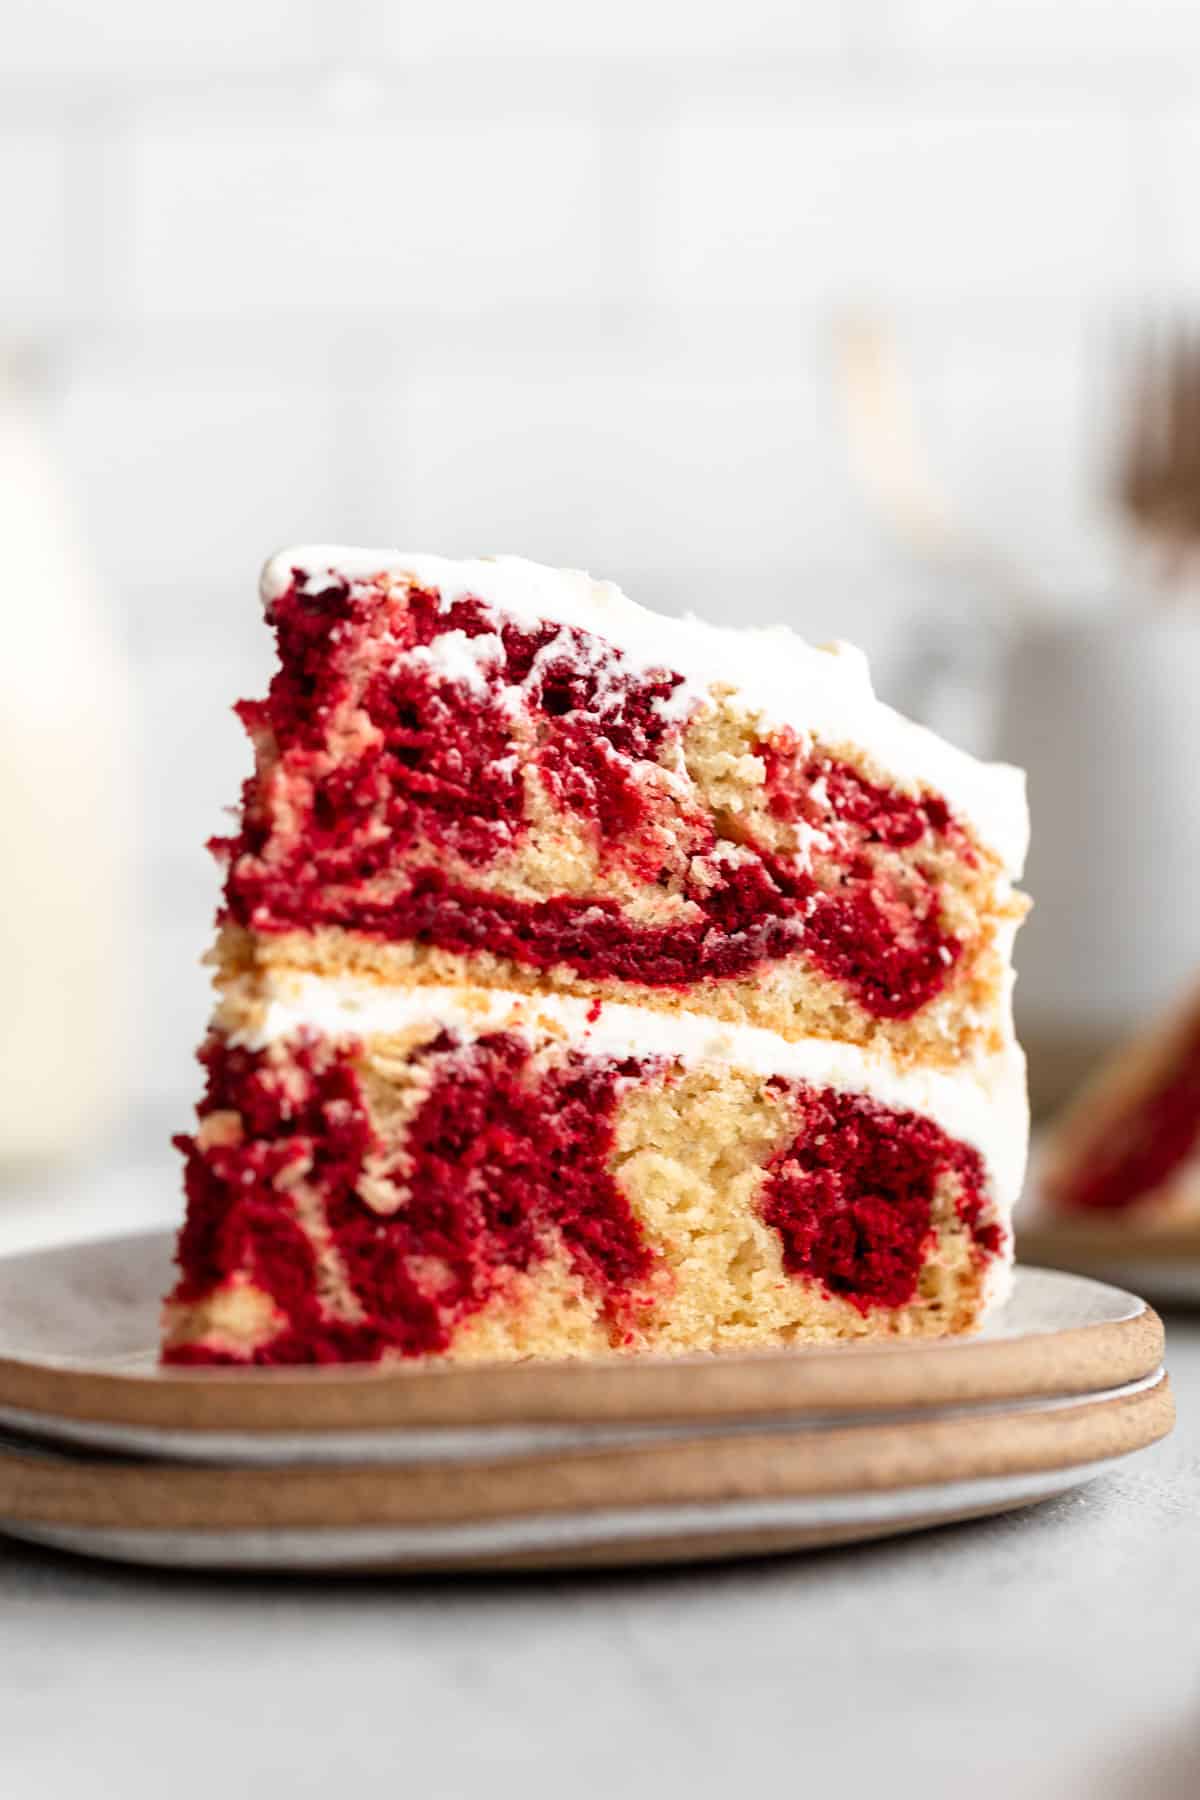
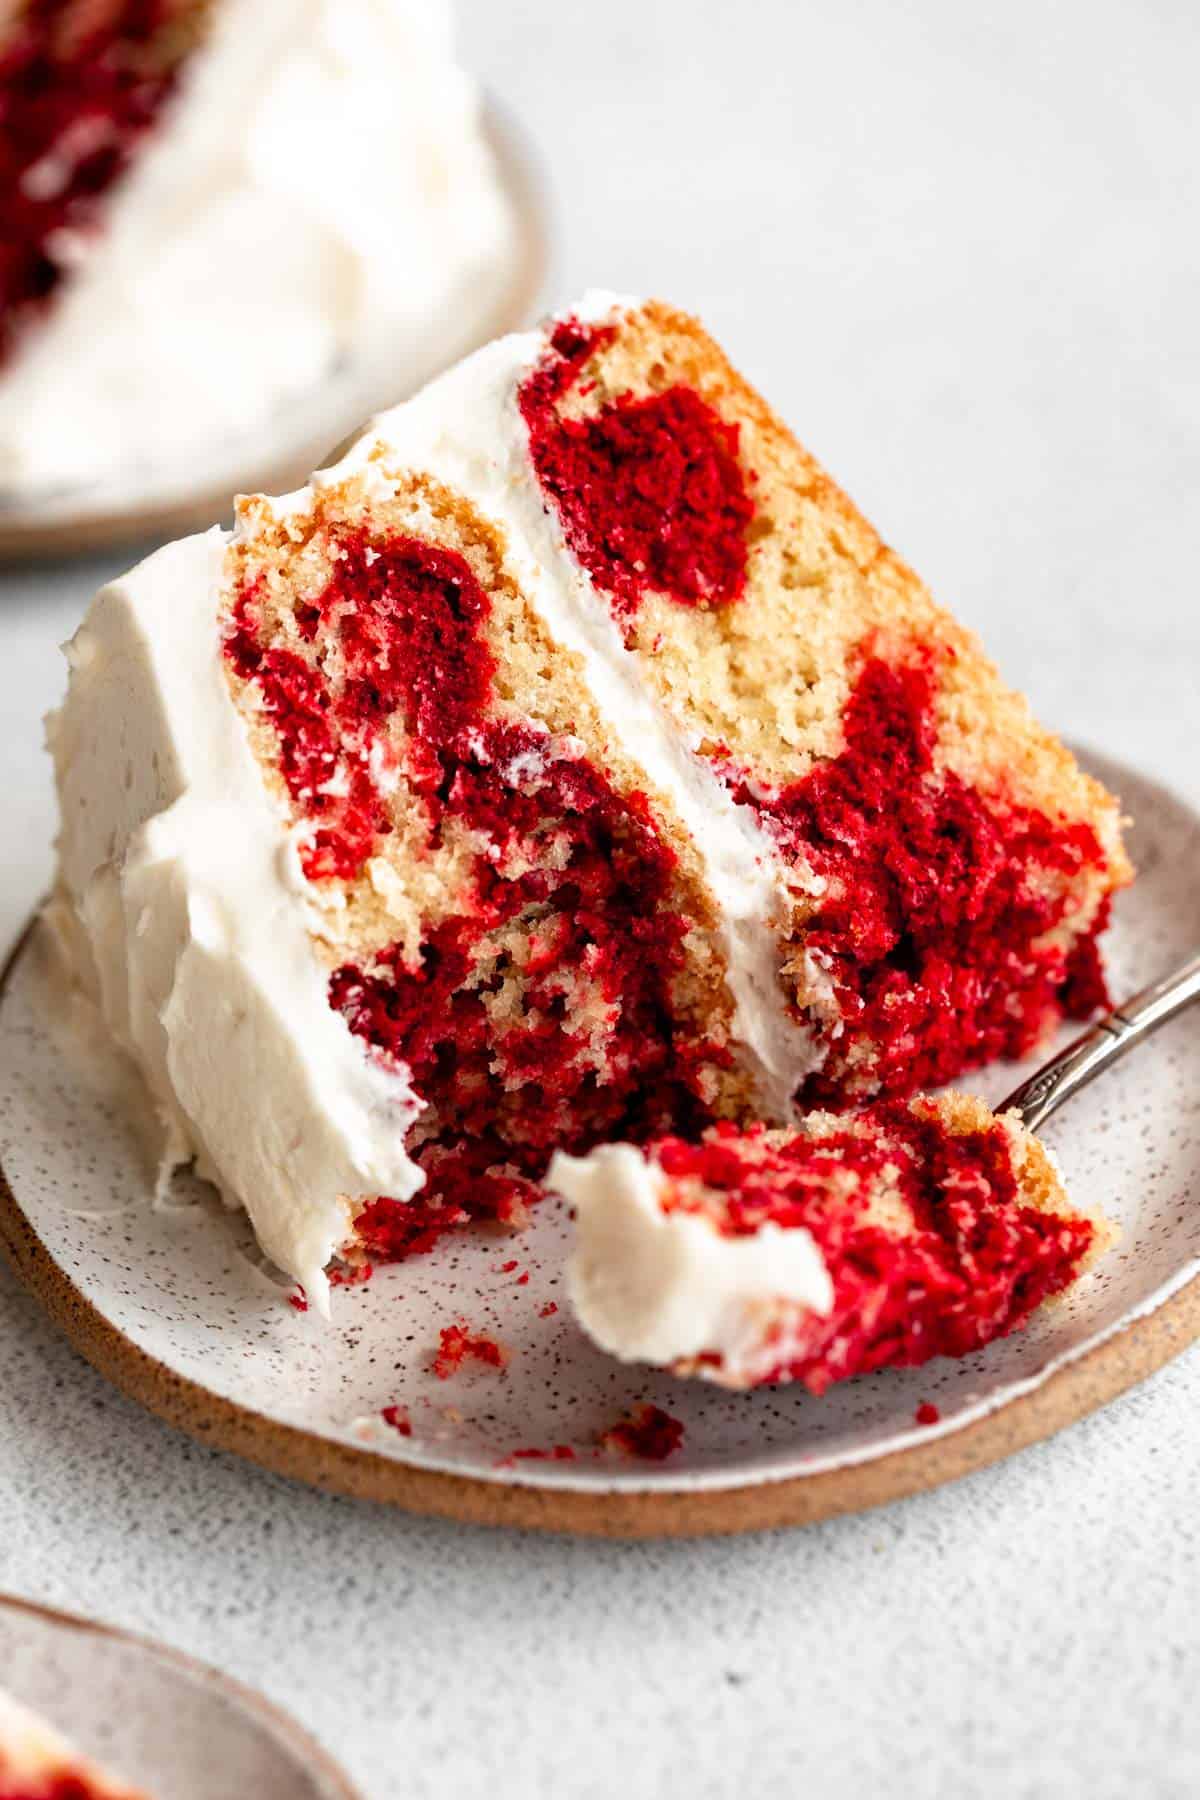
This gluten free red velvet marble cake is moist, fluffy and so easy to make. With swirls of vanilla and red velvet cake, this is a totally crowd pleasing dessert that is just as beautiful as it is delicious!

Marble cakes (and marble cookies) are among my favorite because it’s such a delicious mix of flavors and they look absolutely beautiful of course.
This gluten free red velvet marble cake has a blend of gluten free vanilla cake and red velvet cake.
However, you don’t need to make two separate batters, we’ll just make the base vanilla, and then add some chocolate and red food coloring to half to give us that red velvet cake.
If you love this recipe, try my marble bundt cake or gluten free red velvet cookies next!
Why you’ll love this recipe
- Dairy free friendly
- Moist & fluffy
- Perfectly sweet
- Gluten free
- Easy to make!
How to make red velvet marble cake
Grease and line two 8 inch cake pans with parchment paper, (I like these parchment rounds). I suggest greasing the side of the pan to prevent any sticking there.
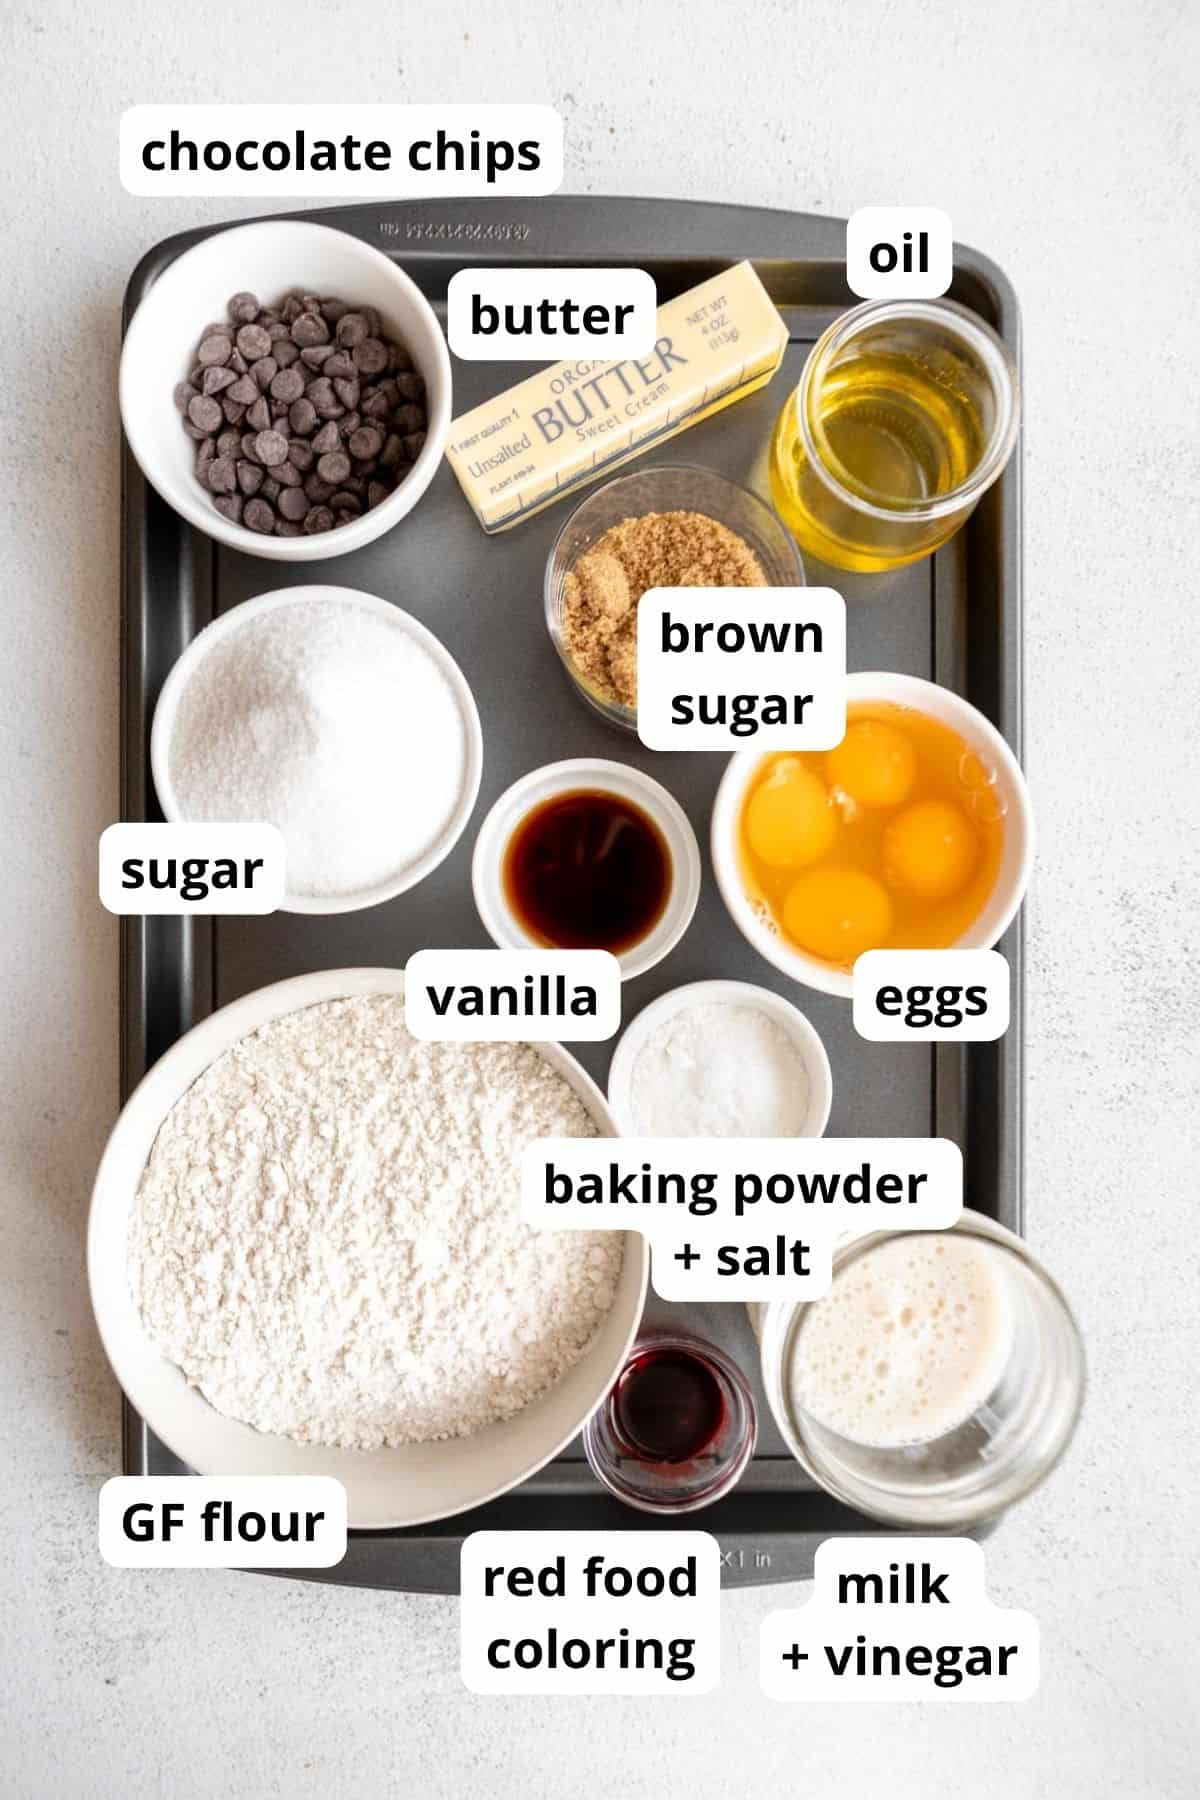
In a large mixing bowl, add the melted butter and both sugars and beat for about 30 seconds with an electric mixer. Add in the oil, milk, vinegar, eggs and vanilla. Beat until combined.
Beat in the flour, baking powder and salt. Be sure to spoon and level the flour, don’t scoop from the bag. Once smooth, scoop out two cups worth of the batter into a second bowl.
Melt the chocolate chips in the microwave in 25 second intervals, stirring between each until melted.
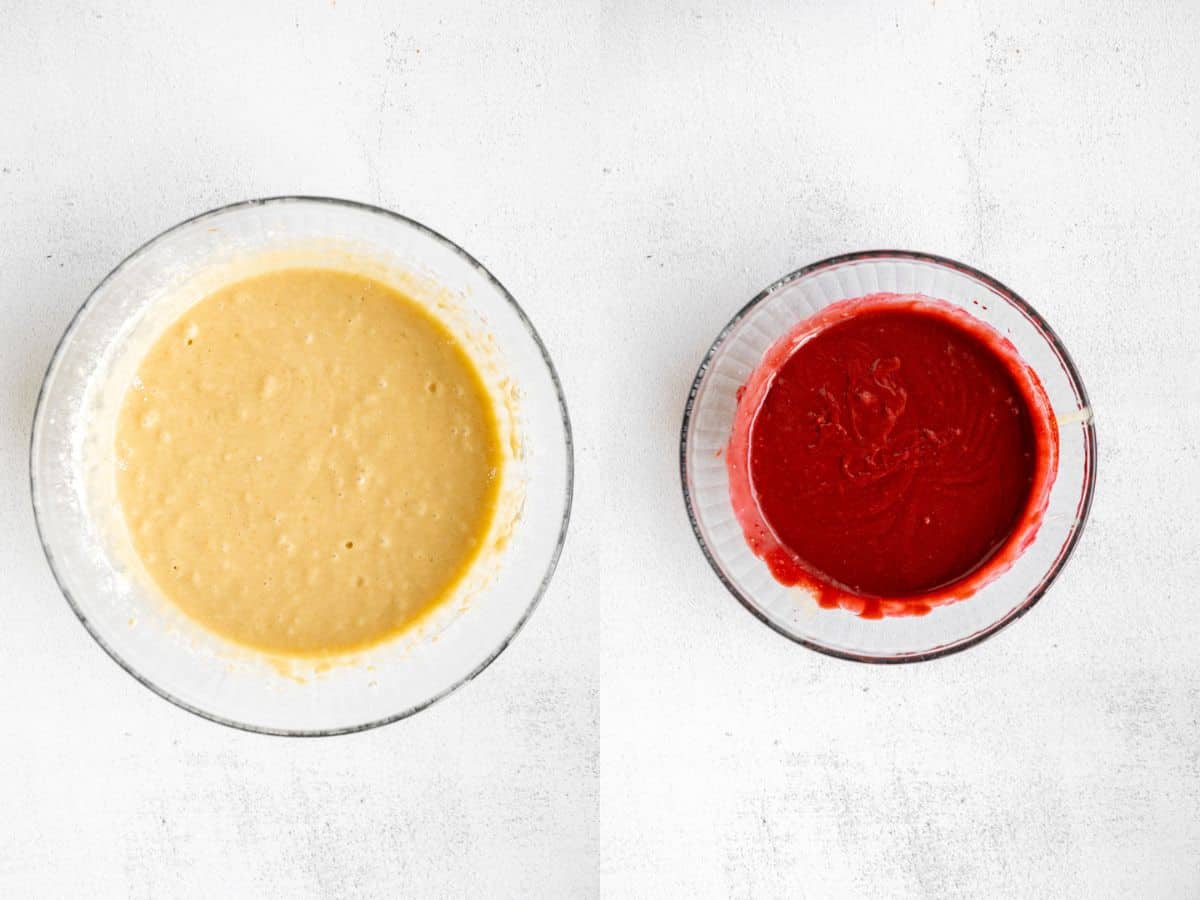
Add the chocolate into the bowl with the 2 cups of batter and add in the food coloring. Beat until combined.
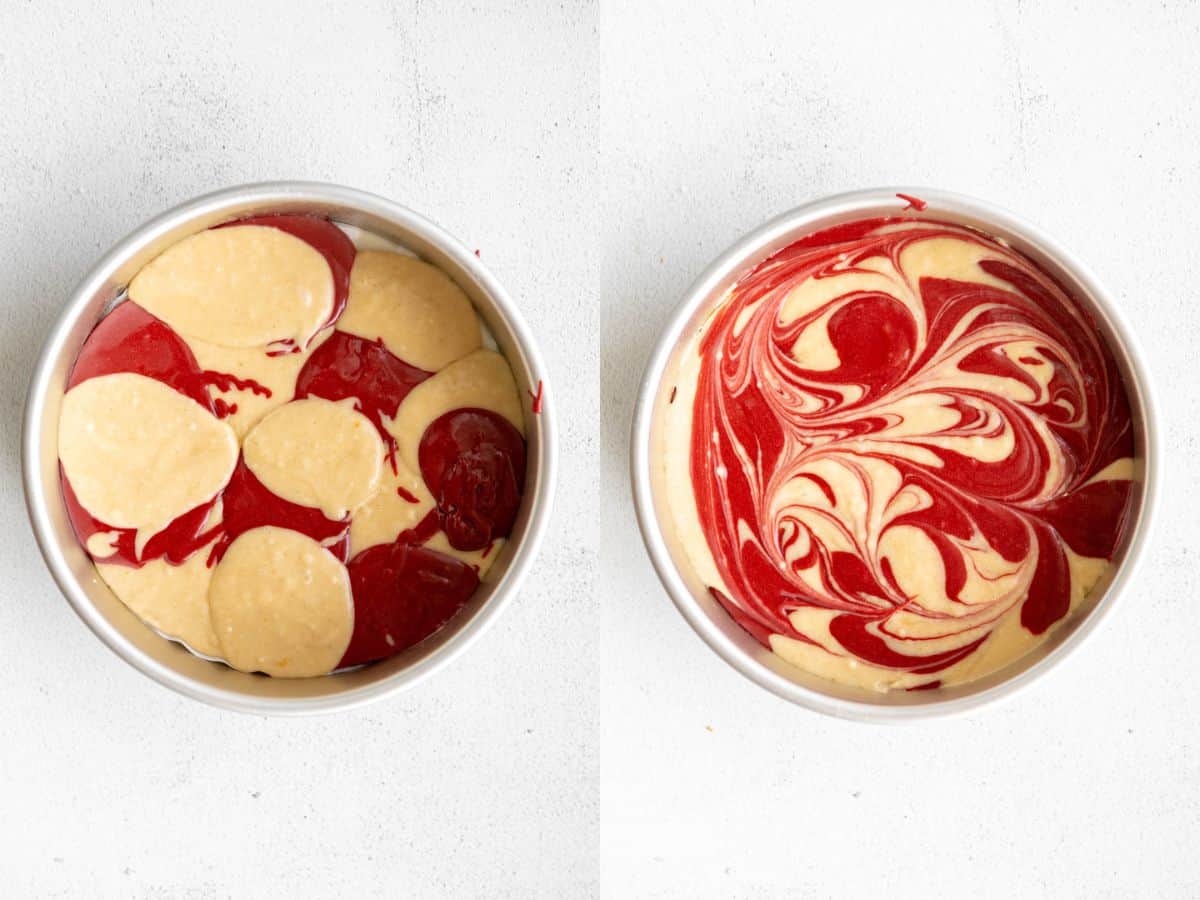
Use two medium scoops and alternate scooping the batter into the cake pans. Take a chopstick or small knife to gently swirl the batter together. Bake for 30-38 minutes or until a toothpick comes out clean.
Let cool in the pan for about 20 minutes, then flip onto a wire rack to finish cooling. After you flip, flip it back over so the bottom is actually on the bottom of the wire rack, this will prevent any cracking.
Once completely cool, top with the cream cheese frosting or regular vanilla buttercream and enjoy!
WANT TO SAVE THIS RECIPE?
How to store and freeze
To store: Once prepared, this gluten free red velvet marble cake will keep for about 3-5 days at room temperature. I usually just keep it right on the cake stand with a cake cover on top.
However, you can also slice it up into individual slices an store in containers. If you store in the fridge, it will keep for a bit longer than at room temperature, but because the cake itself has butter, the texture will firm up a bit.
To freeze: You can definitely freeze this gluten free cake after baking! You want to let it cool completely, (like really completely) then wrap it tightly in plastic wrap an freeze for up to 1 month. You can frost it right from frozen, but then let it defrost before serving.
Do you need food coloring for red velvet cake?
Yes and no. You can definitely make red velvet cake without any food coloring, but it just won’t be red. It will taste exactly the same though!
Some people have luck with a bit of beet extract or a natural color, but it’s not usually as vibrant as the artificial stuff. If you make it without any coloring, it will look more like a light chocolate color.
Ingredient swaps
EGGS. Unfortunately, there is no swap for eggs in this cake. We need four whole eggs, which are key for the structure and texture of the cake. They’ll help it rise an give it a nice fluffy texture.
If you try to make this cake vegan, it will have a very dense and gummy texture, so please do not swap out the eggs!
BUTTER. The cake uses both butter and oil to give a rich flavor but also create a light and fluffy texture. If you want to make it dairy free, simply swap for dairy free butter like Earth Balance!
SUGAR. A mix of light brown and white sugar sweeten the cake but also enhance that rich flavor thanks to the molasses in the brown sugar. I do not recommend any swaps here.
FLOUR. I used the Bob’s Red Mill 1:1 Baking Flour for this cake and I recommend sticking to that for best results. You can try another gluten free blend, but make sure it has xanthan gum.
Unfortunately, almond flour won’t work here. I love purchasing my gluten free flours from Thrive Market to save money.
MILK. I used almond milk, but any kind of milk, either dairy or non-dairy will work here.
More gluten free cakes you’ll love!
- Almond Flour Chocolate Cake
- Vegan Gluten Free Vanilla Cake
- Gluten Free Carrot Cake
- Apple Cake
- Gluten Free Lemon Cake
- 10+ Best Gluten Free Cake Recipes
If you want more recipes straight to your inbox, be sure to subscribe to my email list. Don’t forget to leave a comment and rating if you enjoy this recipe!

Gluten Free Red Velvet Marble Cake
by: claire cary
Ingredients
- ½ cup butter melted
- 1 ¼ cups white sugar
- 7 tablespoons light brown sugar
- 6 tablespoons oil
- 4 eggs
- 1 tablespoon vanilla extract
- 1 cup milk
- 1 teaspoon vinegar
- 3 cups gluten free all purpose baking flour
- 1 tablespoon baking powder
- ½ teaspoon salt
- 4 ounces semi-sweet chocolate chips ounces by weight
- 1 teaspoon red gel food coloring
- 1 batch cream cheese frosting
Instructions
- Preheat the oven to 350 degrees Fahrenheit.
- Grease and line two 8 inch cake pans with parchment paper (I like these parchment rounds). I suggest greasing the side of the pan to prevent any sticking there.
- In a large mixing bowl, add the melted butter and both sugars and beat for about 30 seconds with an electric mixer.
- Add in the oil, milk, vinegar, eggs and vanilla.
- Beat until combined.
- Beat in the flour, baking powder and salt. Be sure to spoon and level the flour, don’t scoop from the bag.
- Once smooth, scoop out two cups worth of the batter into a second bowl.
- Melt the chocolate chips in the microwave in 25 second intervals, stirring between each until melted.
- Add the chocolate into the bowl with the 2 cups of batter and add in the food coloring.
- Beat until combined.
- Use two medium scoops and alternate scooping the batter into the cake pans.
- Take a chopstick or small knife to gently swirl the batter together.
- Bake for 30-38 minutes or until a toothpick comes out clean.
- Let cool in the pan for about 20 minutes, then flip onto a wire rack to finish cooling. After you flip, flip it back over so the bottom is actually on the bottom of the wire rack, this will prevent any cracking.
- Once completely cool, top with the cream cheese frosting or regular vanilla buttercream and enjoy!

Comments
-
Hi! Planning on making this cake this week for my friends birthday. Did you use unsweetened plain almond milk? And which type of oil is best for the cake? Thank you!
-
Yes, plain and unsweetened almond milk! I used just vegetable oil.
-
-
Literally amazing. So fluffy and the flavor is spot on! Definitely going to be in my cake rotation

-
Thank you, Hannah!
-
leave a comment and rating