Red Velvet Brownies

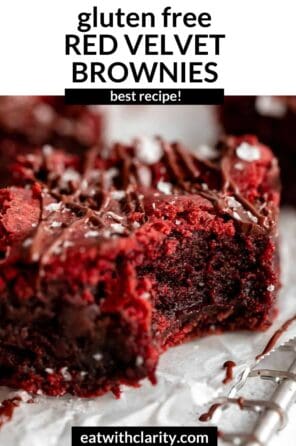

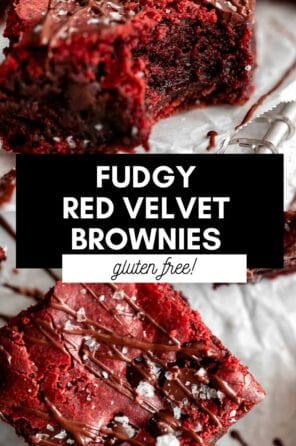
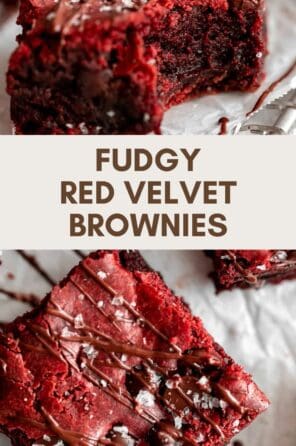

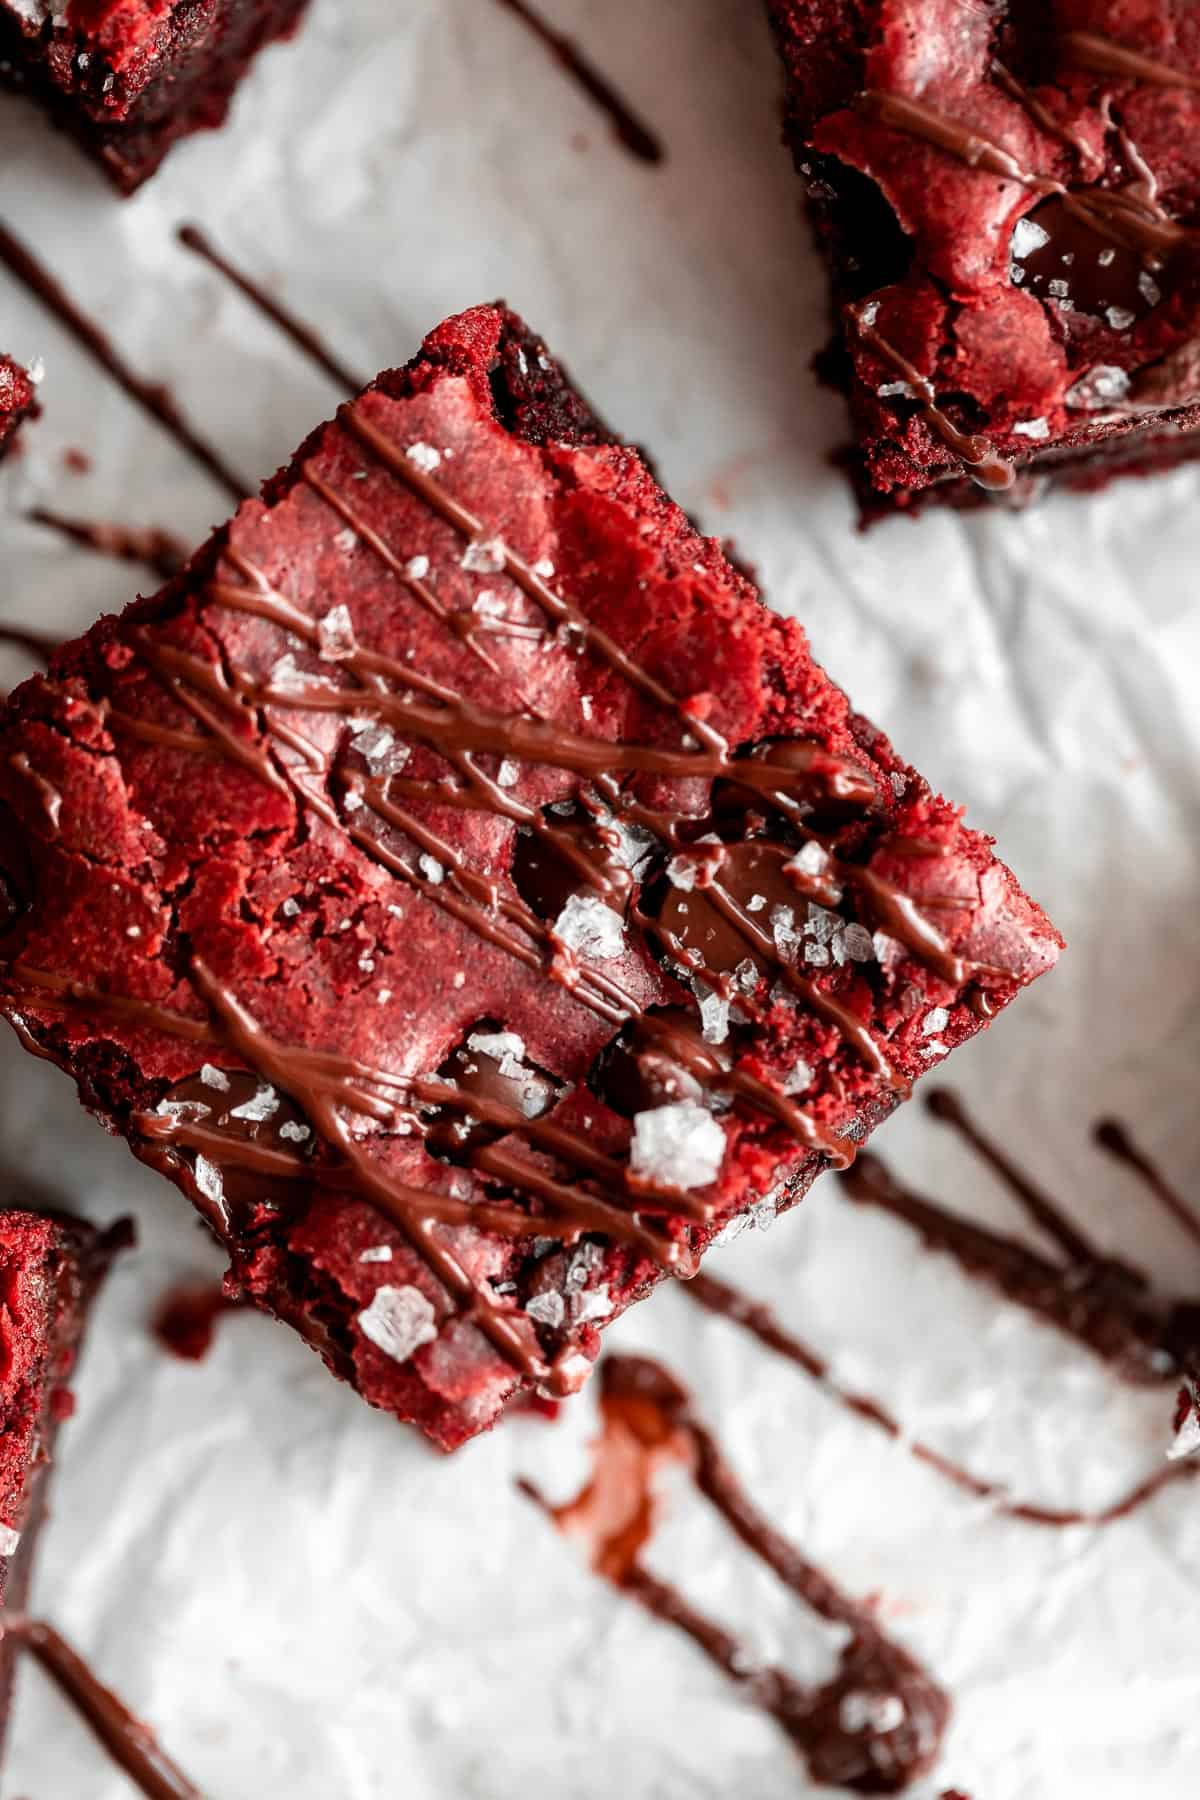
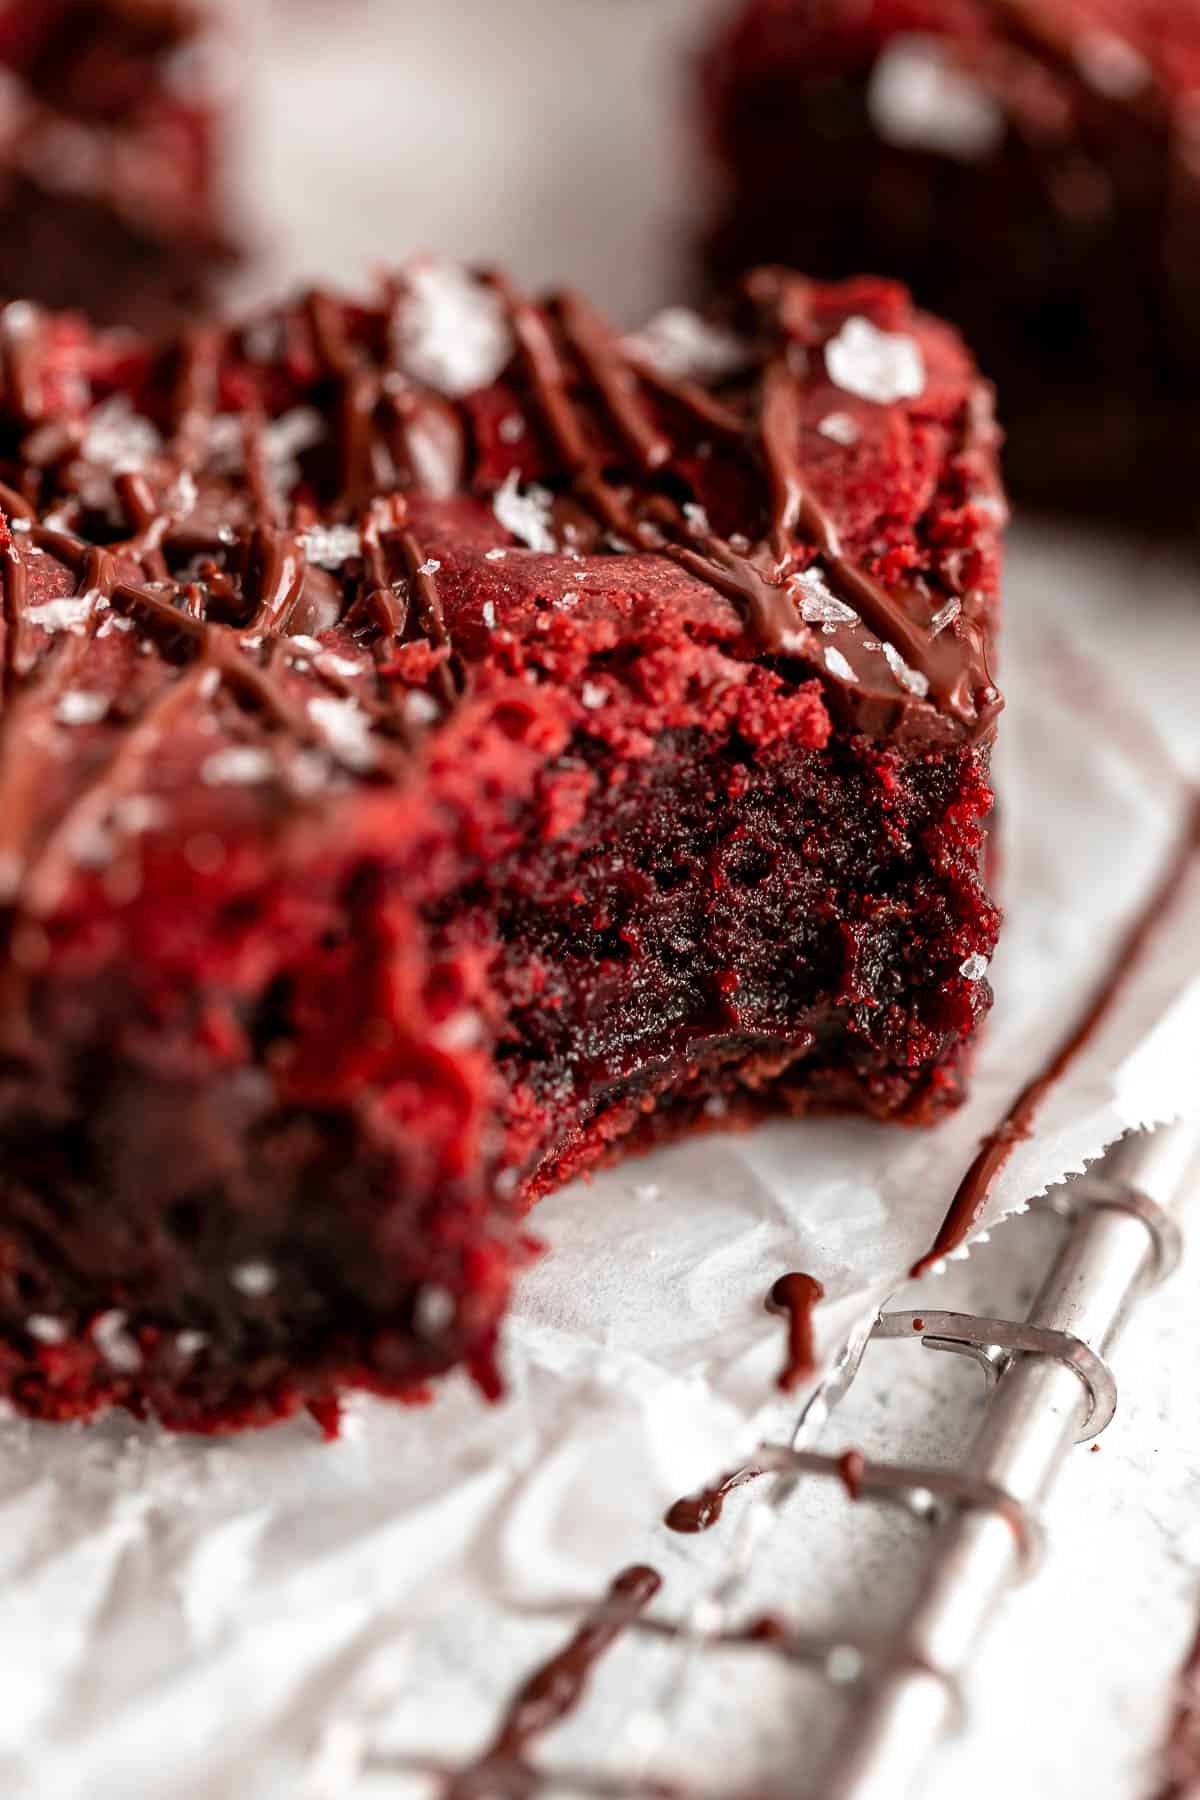
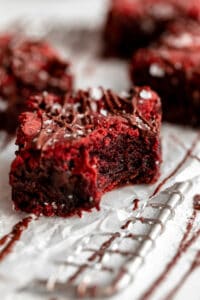
These red velvet brownies are fudgy, easy to make with the perfect hints of chocolate and vanilla. Load them up with chocolate chips, top with cream cheese frosting or enjoy as is! They can be made dairy free and are gluten free.
I love traditional brownies as much as the next person, but sometimes I want a brownie without so much chocolate, you know?
These red velvet brownies (and lemon brownies) are perfect for those moments. They’re fudgy with hints of cocoa and chocolate chips, but nothing overpowering.
Red velvet flavor has hints of both chocolate and vanilla with a rich buttery flavor, and these have a very traditional fudgy brownie texture!
They’re dairy free, gluten free, made in one bowl and perfect for a Valentine’s day treat or just because! If you love this recipe, try my red velvet cake, red velvet marble cake or oreo brownies next!
How to make red velvet brownies
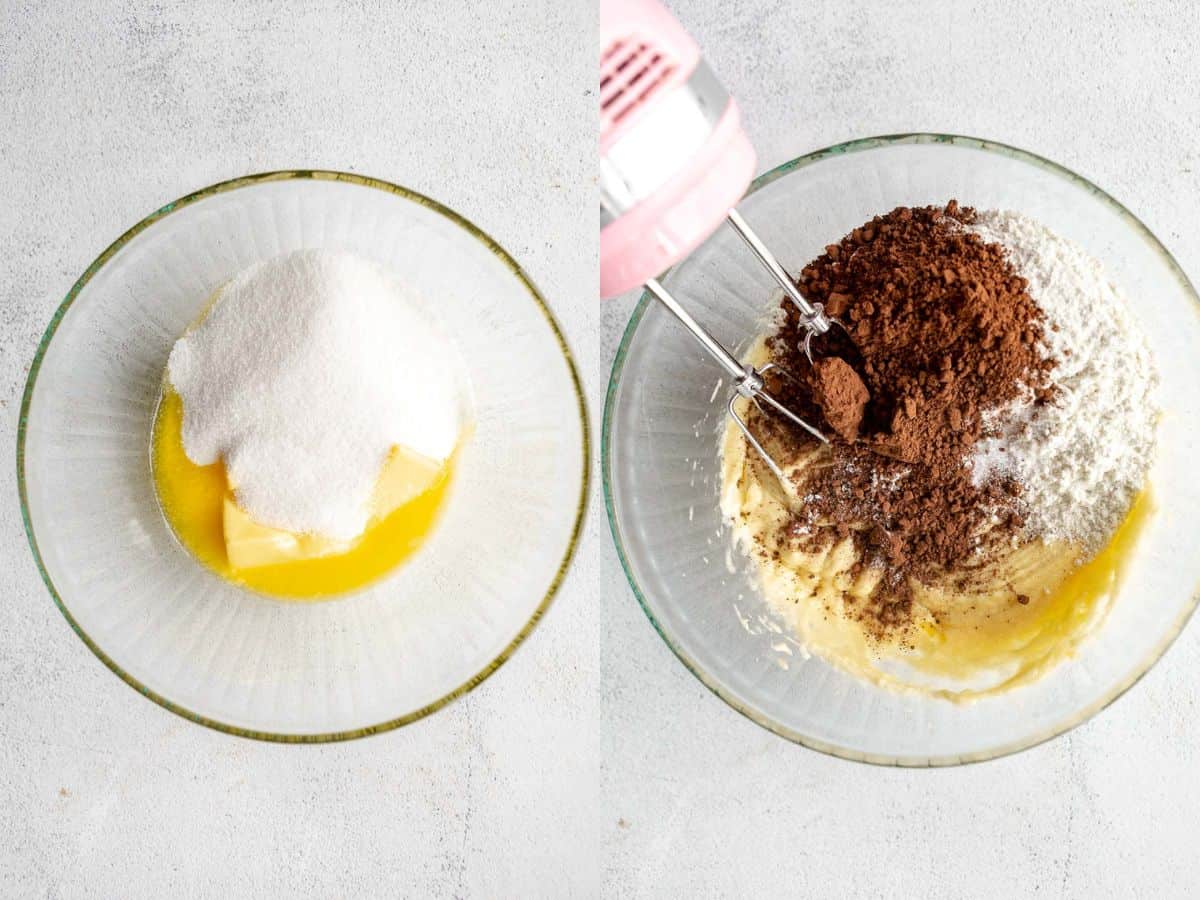
Microwave the butter for 30 seconds. It should be slightly melted, mostly softened.
Beat the butter and the sugar for 1 minute. Beat in the egg and vanilla until well combined. Add in the flour, cocoa and salt. Beat until smooth.
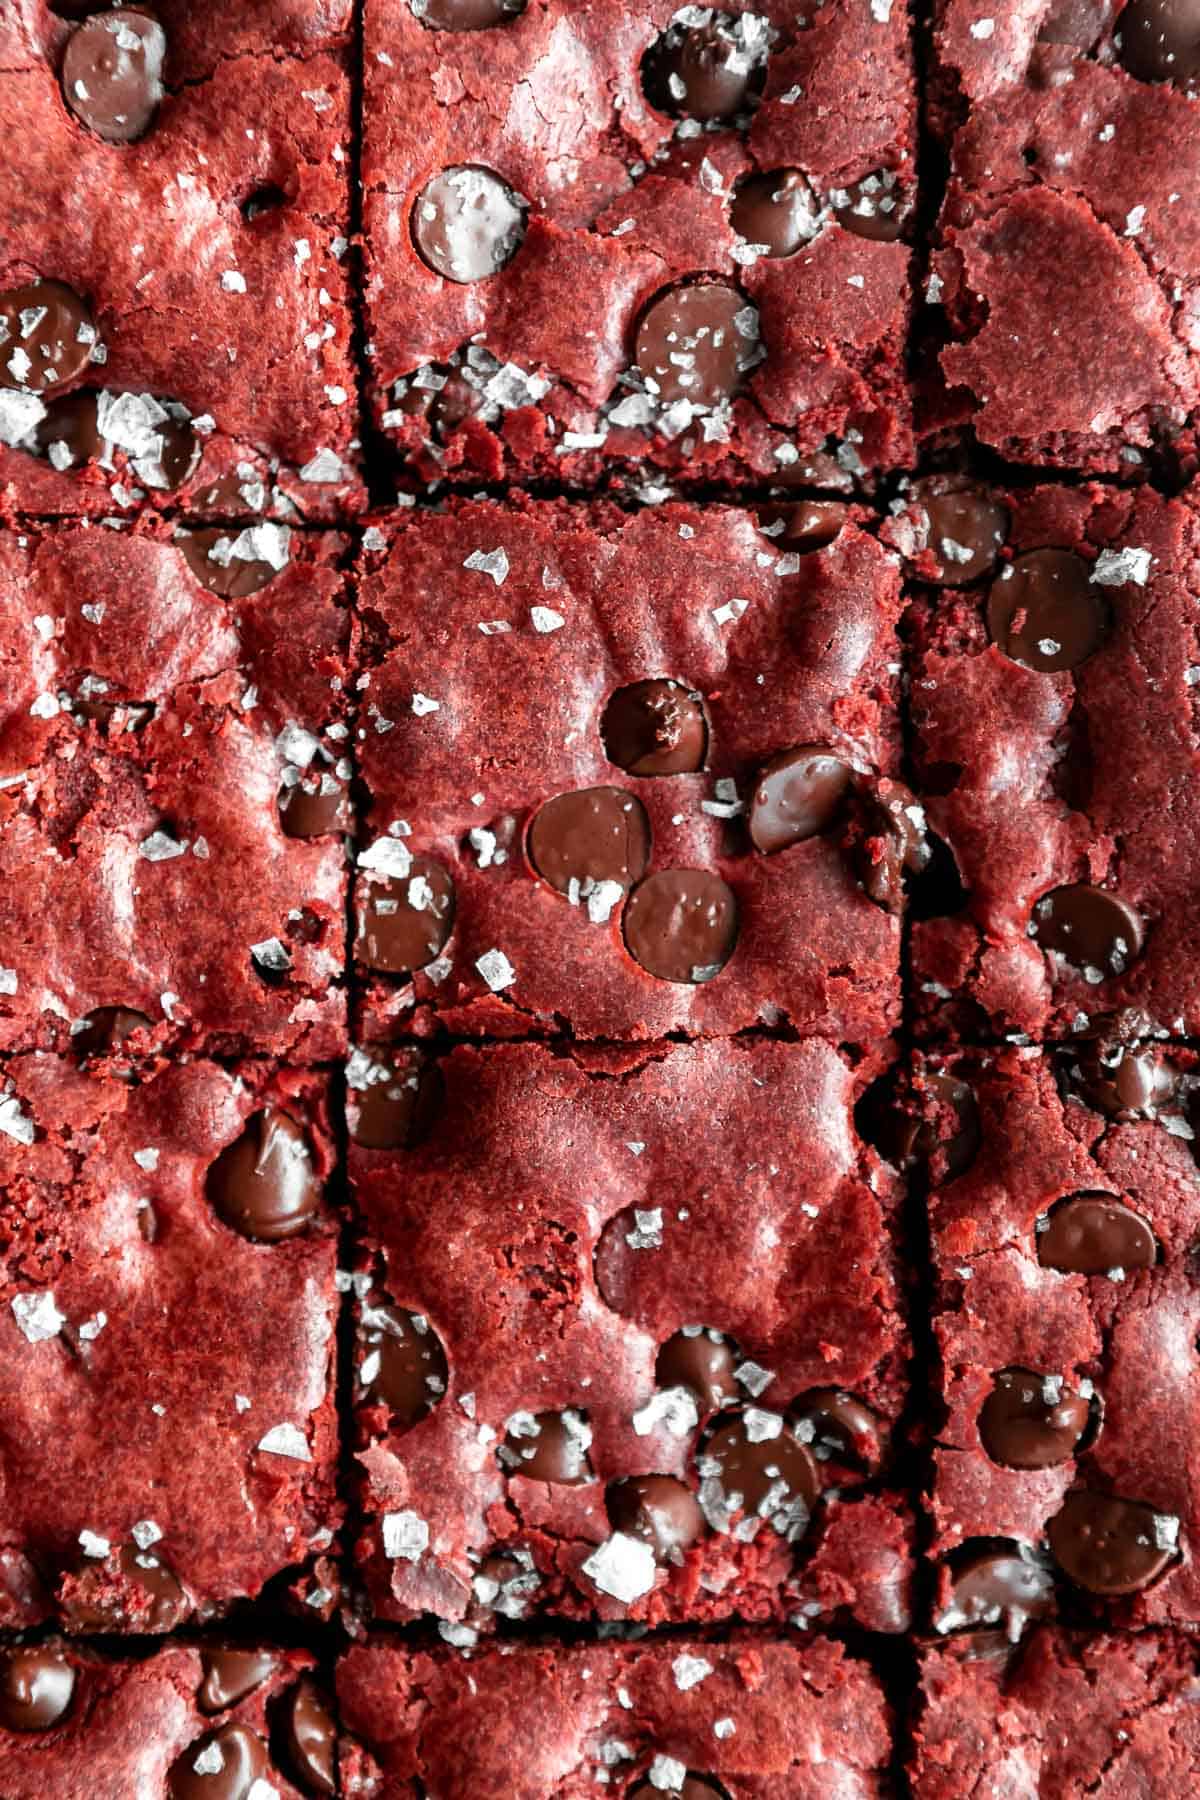
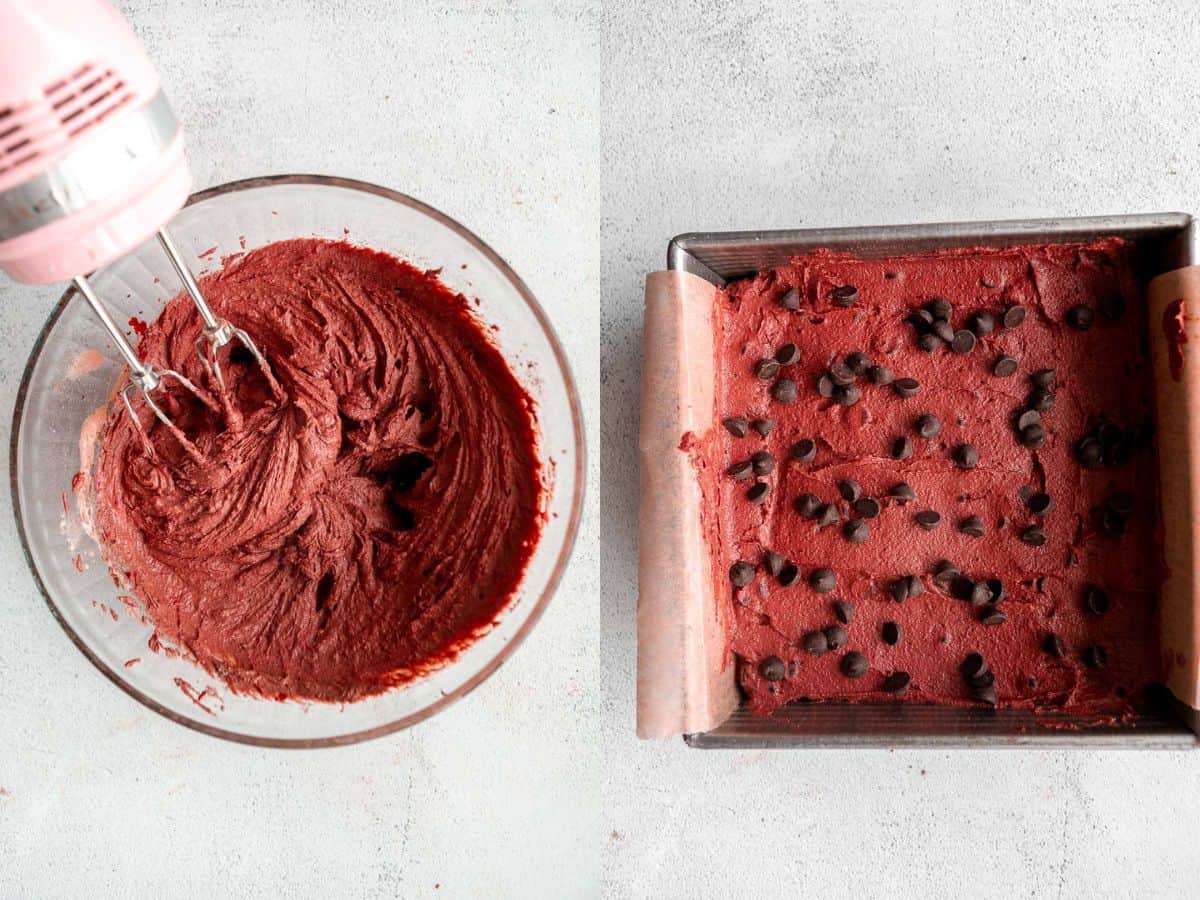
Beat in the food coloring, adding more if you prefer a deeper red color. If you use liquid food coloring instead of gel, you will need more. Fold in the chocolate chips.
Transfer to your prepared pan and spread smooth. Top with additional chocolate chips if desired.
Bake for 30-38 minutes or until a toothpick comes out clean. For fudgier brownies, bake for less time.
Remove from the oven and let cool in the pan for about 20 minutes, then lift out of the pan and let cool on a wire rack. Slice into 16 squares and enjoy! Try my gluten free skillet brownie or gluten free M&M cookies next!
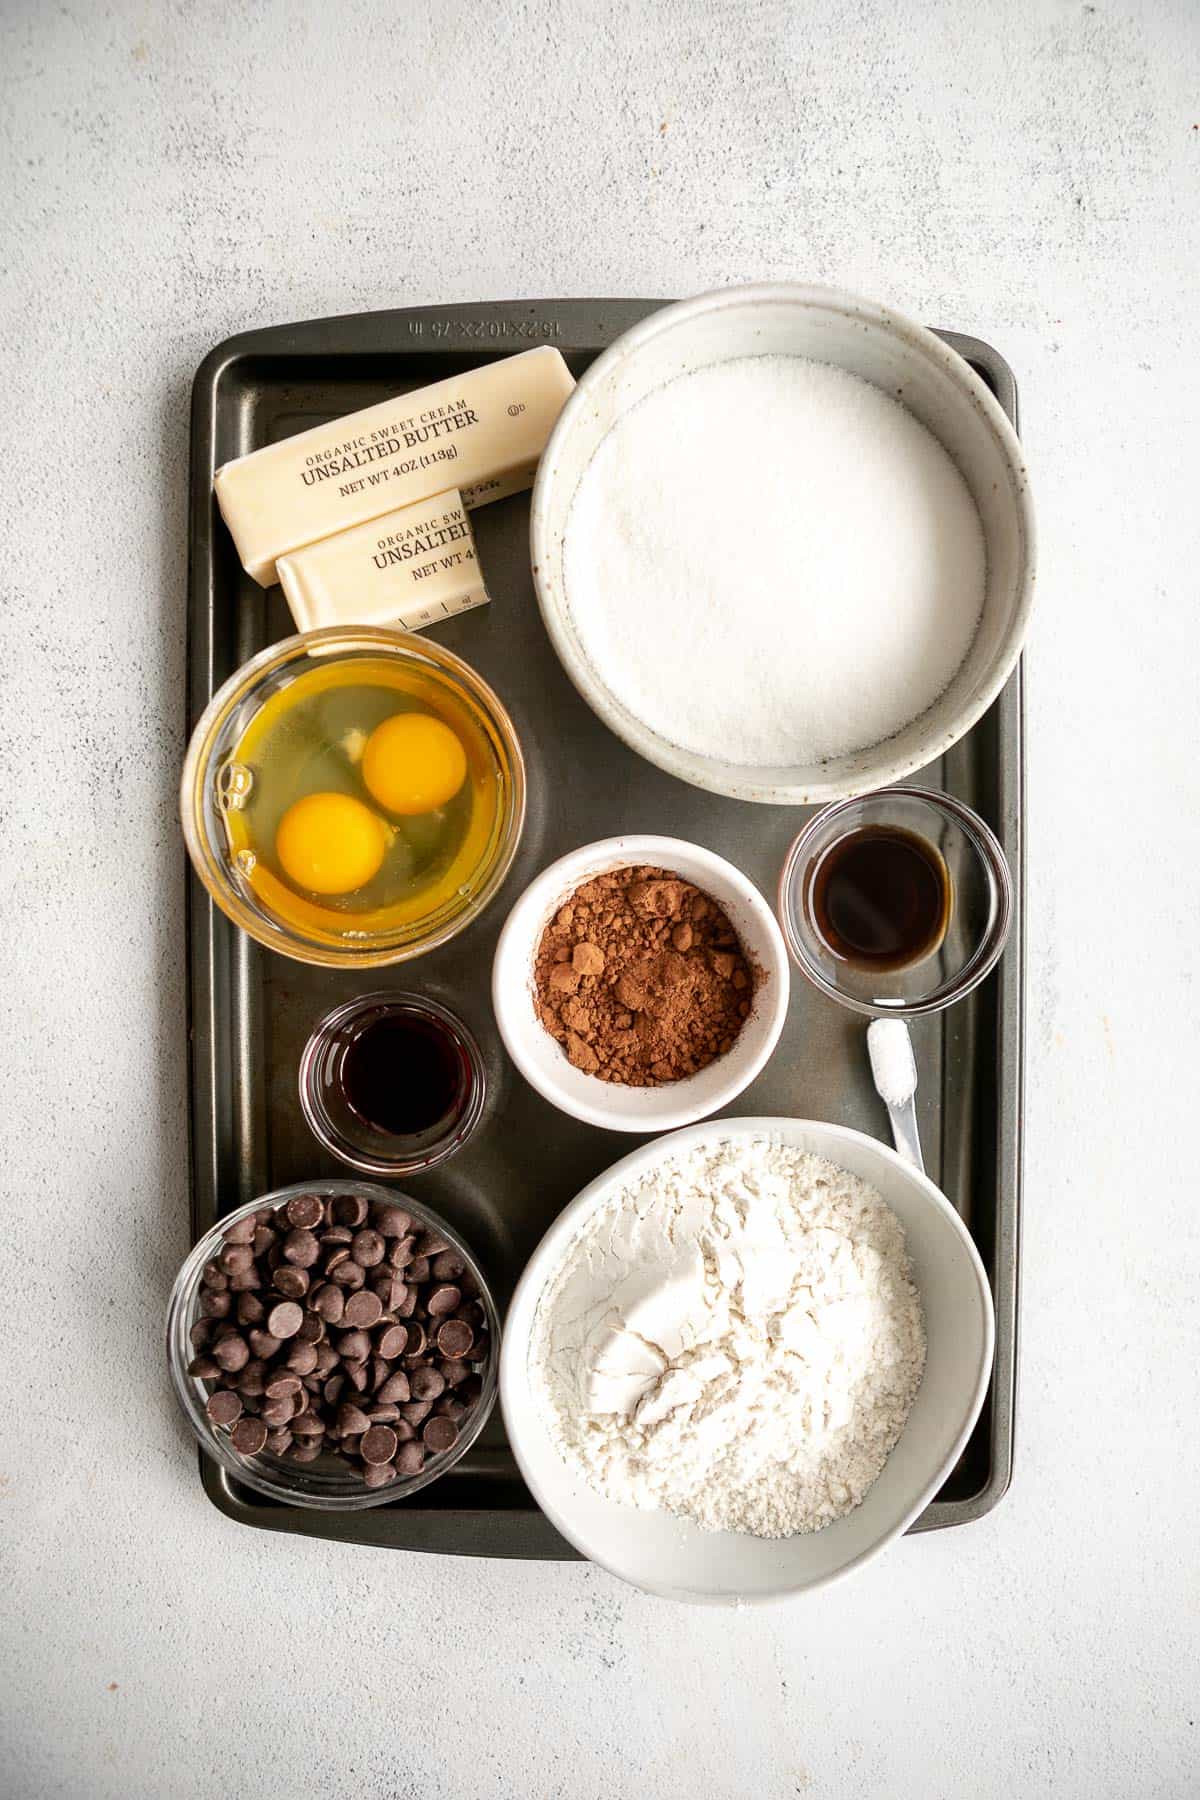
Key ingredients
BUTTER. A key ingredient to add moisture and flavor to brownies (same with brownie bites)! I used regular butter, but you can use a vegan butter to make these dairy free brownies. I do not recommend coconut oil or regular oil, as the buttery flavor is key for red velvet! Same with my brown butter brownies!
SUGAR. Just regular white sugar works best here.
EGGS. You need two eggs which will help bind all of the ingredients together as well as help the brownies rise a bit.
FLOUR. I used gluten free all purpose flour, but regular all purpose will work too. I do not recommend almond or other alternative flours here. Instead, try my oat flour brownies!
COCOA. These don’t have as much cocoa as traditional brownies, just enough to add that chocolate flavor.
FOOD COLORING. This is technically optional because it doesn’t do anything for the flavor, but food coloring is needed to get that red velvet color!
WANT TO SAVE THIS RECIPE?
Tips for a fudgy texture
The main thing here is that we aren’t using any leavening agents (baking soda or powder). This will ensure the brownies don’t rise too much while baking and stay nice and fudgy. The eggs will provide the lift needed to ensure the brownies aren’t dense.
The second thing is the bake time. The longer you bake, the more “set” the center will be. Start with 30 minutes and add more time as desired. They will continue to set a bit as they cool, so keep that in mind when deciding when to take them out of the oven!
If you prefer cakey brownies, you can add in 1/2 teaspoon of baking powder to add a bit more lift to the texture.

How to store and freeze
Once prepared, these red velvet brownies will keep for about 3-5 days at room temperature. To ensure they don’t dry out, keep them in an air tight container.
These brownies are also freezer friendly! Be sure to let them cool completely, then slice into squares, wrap tightly in plastic wrap and place in a freezer safe bag for up to 2 months. Reheat in the oven at 300 until warm through the center and enjoy!
Frequently asked questions
Can I make them vegan?
While I have not tested these red velvet brownies without eggs, since there are only two, I do think a vegan version could work. My suggestion would be to use flax eggs or a store bought egg replacer.
If using flax eggs, combine 2 tablespoons of ground flax seeds with 5 tablespoons of water. Mix together and let thicken, then add to the recipe in place of the eggs.
Can I use a chocolate bar instead of cocoa powder?
I don’t recommend that since a melted chocolate bar will be adding to the wet ingredients, which will change the texture of the brownies. For best results, stick to the recipe as written!
Can I use a different sugar?
This recipe definitely works best with white granulated sugar, but you can use coconut sugar for a refined sugar free option. Keep in mind the color of the brownies will be much darker and you may need more food coloring to get a true red color.
More desserts you’ll love!
- Flourless Brownies
- Red Velvet Cupcakes
- Brownie Cookies
- Vegan Gluten Free Brownies
- Vegan Brownies
- Red Velvet Crinkle Cookies
Lastly, if you want more recipes straight to your inbox, be sure to subscribe to my email list. As always, tag me on instagram if you make this recipe so I can see your creation!

Red Velvet Brownies
by: claire cary
Ingredients
- ¾ cup butter dairy free or regular
- 1 ¼ cup granulated sugar
- 2 eggs
- 1 teaspoon vanilla extract
- 1 ½ cups gluten free all purpose flour can sub regular
- 3 tablespoons cocoa powder
- ¼ teaspoon salt
- 1 teaspoon gel red food coloring
- ⅔ cups chocolate chips
Instructions
- Preheat the oven to 350 degrees Fahrenheit.
- Line an 8×8 baking pan with parchment paper and set aside.
- Microwave the butter for 30 seconds. It should be slightly melted, mostly softened.
- Beat the butter and the sugar for 1 minute.
- Beat in the egg and vanilla until well combined.
- Add in the flour, cocoa and salt. Beat until smooth.
- Beat in the food coloring, adding more if you prefer a deeper red color. If you use liquid food coloring instead of gel, you will need more.
- Fold in the chocolate chips.
- Transfer to your prepared pan and spread smooth. Top with additional chocolate chips if desired.
- Bake for 30-38 minutes or until a toothpick comes out clean. For fudgier brownies, bake for less time.
- Remove from the oven and let cool in the pan for about 20 minutes, then lift out of the pan and let cool on a wire rack.
- Slice into 16 squares and enjoy!
Notes
Comments
-
can i substitute the granulated sugar with dark brown sugar?
-
That should work but the color will be different.
-
-
Can I use a 9×12 pan? If so should I do the same bake time?
-
I would double the recipe if you use a pan that size! And bake for maybe 5-10 extra minutes.
-
-
Does it have to be gel food colouring? Or can you use the liquid ones too?
-
You can use liquid, you will just need more since it isn’t as concentrated.
-
-
For the sugar, can you do 1 cup of regular sugar and 1/4 of the dark brown sugar?
-
Yes, that will work!
-
-
Always nervous trying new recipes and tried this for a group last night. It was a HIT! So easy and yummy. Keeping this one in my back pocket

-
Amazing, so glad it was a success!
-
-
These brownies are absolutely delicious! I followed the recipe exactly and they came out perfect. This recipe is a keeper!
-
Amazing, so happy you enjoyed these!
-
leave a comment and rating